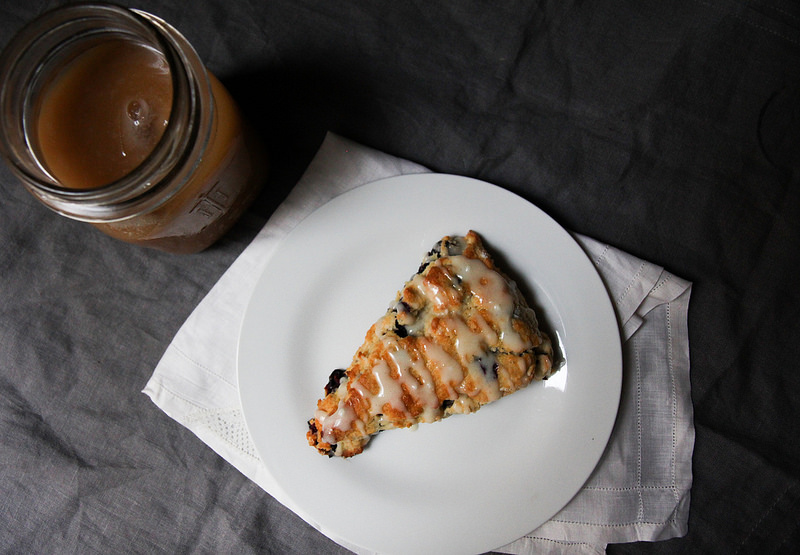
Gluten-Free Blueberry Scones

As I sit here in a cafe's sidewalk seating section with the warm sun beaming at my back, birds happily chirping, people walking along in shorts and skirts, and my iced coffee dripping with condensation, I can’t help but ignore the fact that apparently it’s the first day of fall. I’m sorry, what?

Per usual the season has flown by too quickly. I spent my last few weeks of summer completely wrapped up in my amazing new job (filed directly under a-great-problem-to-have) and I let this space wander. Now all of a sudden it’s fall and I’ve got a pile of summer recipes that are just too summery to post.

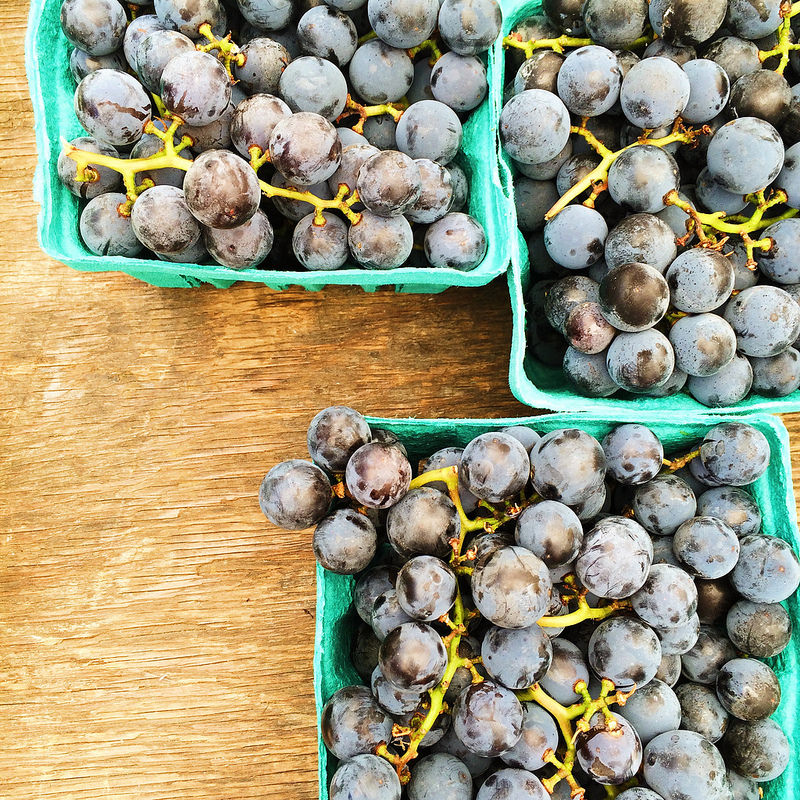
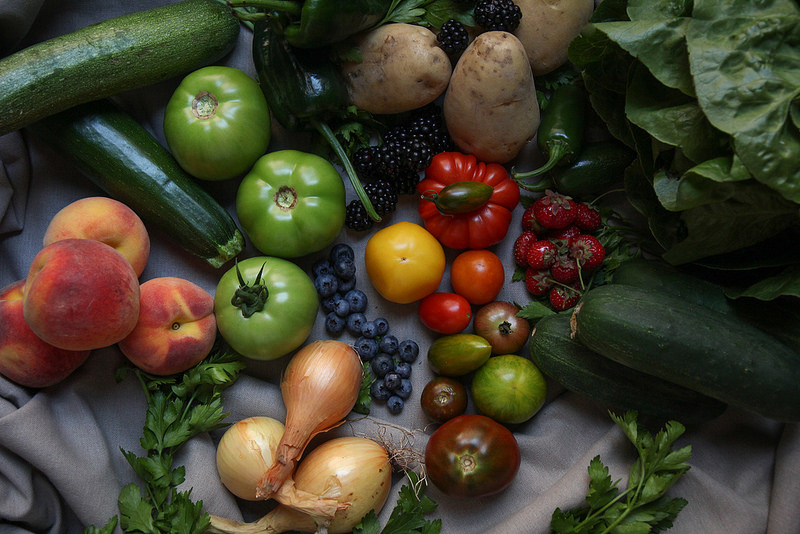
However, this year more than ever I’ve realized that summer “ain’t over ‘til it’s over” (R.I.P Yogi <3) and that means I’ve been bringing home blueberries by the quartful  from the farmers' market and will continue to do so until I can’t anymore. That also translates to --- I have too many blueberries in my fridge to be useful right now. But it also means, I have absolutely ZERO qualms telling you to make these blueberry scones right this second while blueberries are still in their prime.

These scones are perfectly moist and crumbly at the same time a.k.a. perfect scone texture. They’re bursting with berries and are gluten free, but full of flavor. If I had turbinado sugar on hand, I would have sprinkled that on top for a crisp, shattering top, but instead I lightly drizzled them with a glaze that also did the job. Either way, you will get a perfect scone. Along with the perfect way to savor the very last drops of summer.

At the very least, you can take comfort in the fact it’s no longer too hot to turn on the oven, so you really have no excuse.


Blueberry Scones

adapted from this Smitten Kitchen recipe and this Food52 recipe

Ingredients:

1 cup white rice flour

1 cup brown rice flour

1 tablespoon baking powder

¾ teaspoon salt

1 cup buttermilk, cold

3 tablespoons maple syrup

1 egg

1 teaspoon vanilla

6 tablespoons very cold unsalted butter, cut into small cubes

1 cup blueberries

1 egg beaten or few tablespoons heavy cream for washing the tops of the scones

Optional topping:

Glaze

2 tablespoons of heavy cream

¼ cup organic powdered sugar

or

2 tablespoons turbinado sugar for sprinkling

Directions:

Heat oven to 425 degrees.

Line a large sheet pan with parchment paper or a silicon mat.

In a large bowl, mix together the flour, baking powder, and salt.

In another large vessel mix together buttermilk, maple syrup, egg, and vanilla.

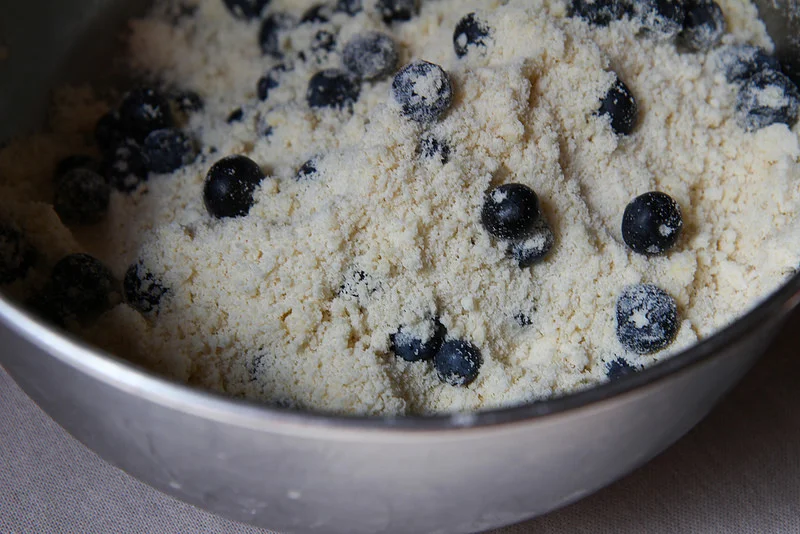
Next cut the cold butter into the flour mixture and using your fingers mush the butter into the flour. The mixture should become like wet sand. At most the butter should be about the size of peas. Quickly add the blueberries to this mixture and gently toss until they are evenly distributed.

Add the wet ingredients to the dry and with a fork gently fold the wet into the dry. Mix until the batter just comes together.

Dump the dough onto a well floured surface and form gently into a disk and pat down until it’s about one inch thick.

Using a large knife or bench scraper cut the disk into eight equal sized wedges.

Transfer wedges to the prepared sheet pan and space at least 1 inch apart. Brush the tops with beaten egg or heavy cream.

Bake for about 20 to 25 minutes or until the tops are a golden brown.

For the optional glaze: whisk cream and powdered sugar together until a smooth glaze comes together. Let the scones cool just slightly before drizzling glaze over the tops. Or before baking, sprinkle tops with raw turbinado sugar.

Yield: 8 scones

Sour Cherry Oat Crumble Muffins

I spent the first three weeks of sour cherry season walking right on by them. Part of it was the $12 a box price tag. The other part was that I had no clue what I would do with them, so I couldn’t justify the $12 a box price tag.

muffinslast.jpg

But I finally succumbed and doled out a hefty portion of my market budget for a quart or two. Coming out on the other side of it, though, I can say it was worth it. Also as the season has lingered on the price did come down a bit.

After the cherries themselves convinced me to make some compote out of them, I tasted it and was like I’m eating exactly what I love about cherry pie. Okay, I get it. I get what the big deal is. Then it was only a matter of figuring out what to put it in that wasn’t cherry pie. Because, as I’ve already embarrassingly admitted, I don’t really like pie. 

I know...I know.

muffins3.jpg
muffins4.jpg

So first, these popsicles happened. But I was left with a good amount of compote still to use. Which was not really a problem. I could have left well enough alone and just had a half pint jar of it in my fridge for a few weeks to come -- to swipe on toast or swirl into yogurt or top ice cream with. What I did though, was swirl it into some muffin batter and then covered that with a crumble, because, it just made sense at the time.

Barely sweet gluten free batter, swirled with puckery sour cherry compote, topped with buttery sweet oat crumble was definitely a good decision. Let me know if you think so too...

muffins5.jpg
muffinsfinal.jpg

Sour Cherry Oat Muffins

Adapted from this Canelle et Vanille recipe

Ingredients:

Oat Crumble:

1 cup old fashioned oats (gluten free if needed)

¼ cup coconut palm sugar (or brown sugar)

¼ cup coconut flour

pinch of salt

3 tablespoons butter

Muffins:

3 eggs

½ cup raw sugar

1 cup full fat greek or other yogurt

½ cup melted butter

1 teaspoon almond extract

1 cup brown rice flour

½ cup millet flour

2 tablespoons tapioca starch

1 tablespoon baking powder

½ teaspoon salt

1 cup cherry compote (recipe here)

Directions:

Heat oven to 350 degrees.

In a medium sized bowl combine oats, coconut palm sugar, coconut flour, and salt. Cut the cold butter into the crumble mix and mush together with your fingers or a pastry cutter until butter is mixed into the oat mixture well. It should clump if you press it together in your hands. Set aside.

In a large bowl, whisk together eggs, sugar, yogurt, melted butter,  and extract to combine well. Add flours, tapioca starch, baking powder, and salt and whisk well to combine.

Line a muffin tin with cupcake liners. Fill each wrapper about three quarters of the way with batter. Next dollop about 1 tablespoon of cherry compote onto the batter of each muffin. Take a tooth pick or other type of skewer and artfully drag the compote throughout each muffin to create swirls.

Lastly sprinkle a little bit of oat crumble on top of each muffin.

Bake in oven for about 20 to 25 minutes until they are golden brown and a cake tester comes out clean.

Note: You might have oat crumble leftover if you don’t use it all on top of the muffins. Simply line a sheet pan with some parchment paper and spread the crumble out on it. Bake it in a 350 degree oven for about 10 to 15 minutes or until golden and toasty. Once cooled, place in an airtight container and use on yogurt or ice cream like you would a granola.

Makes 1 dozen muffins.

Strawberry Cornmeal Pancakes

Once upon a time I went to film school. I spent four years studying the art of filmmaking and earning a rather questionable bachelor’s degree since our studio classes took extreme precedence over our regular humanities courses. Among the cast of characters I met along the way, my production professor was definitely the most memorable in the best way.

He had an enviable handlebar mustache, an unruly mop of charcoal grey hair, and was the type to wear sunglasses at night. He had a thick eastern European accent and was a goldmine of amazing yet basically untranslatable idioms. One of his classics was not to “confuse frogs with grandmothers” followed by “it rhymes in my language”. It tended to leave the majority of our class scratching our heads as he usually applied it any situation he felt it called for. I had an affinity for his sayings that had to do with food, for now obvious reasons. He always compared filmmaking to making soup. When he wanted you to think about something or work on something a little longer he would say, “let it simmer”. When adding to the conversation, he would “add bacon to the pan” but not because he liked bacon, but because “I just like the sizzle”.

batter2.jpg

Since starting this weird food writing journey, besides a brilliant piece of editing advice (“use the axe, not the tweezers”), the line I think of most happens to be about pancakes. When we were in film school, he was essentially applying it to first drafts of the screenplays, first takes of the shoot, first editing passes of the film. But now in my second life, I am applying his advice in the most literal manner.

Here’s what you need to know, and this is some deep shit, so get ready. It can be applied literally and figuratively as I’ve already pointed out. But basically, remember when making pancakes or anything else --- that “the first pancake is always bad”.

Oh man, it’s like the truest thing anyone has ever said. Legitimately changed my life. I think of it every.single.time. I make pancakes and never feel bad when the first one is terrible. Even these. Although I do have to say, practice can make perfect. I tend to over butter the first time around which kind of deep-frys the pancake. Sounds good in theory but that’s not what makes a perfect pancake. Low heat is important; the key to pancakes is patience. If the pan is too hot, the outside and the butter will burn, but the inside will be raw. So remember --- lower heat than you think, less butter than you think, more time than you think along with the most patience. And this, the best advice of all, remember that “the first pancake is always bad”.

Now just because I have no idea how to segue into this, can I let you in on a little secret? Not only are these pancakes so seasonal, made from mostly local ingredients, quite possibly organic and totally gluten free --- they’re also birthday pancakes. June 29th was sizzle & sass kitchen’s first birthday. Since my first post, every day behind the stove, the camera, and the keyboard in the pursuit of this site has never felt more right. This project has turned into a full-on passion and there’s really nothing I’d rather do with my days. Thank you to those of you who take the time to read these posts. Here’s to many more! Let’s toast with these pancakes.


Strawberry Cornmeal Pancakes

adapted from this smitten kitchen recipe

Ingredients:

¾ cup rice flour

¾ cup fresh milled organic fine ground corn flour

½ teaspoon sea salt

½ teaspoon baking soda

½ teaspoon baking powder

1 cup buttermilk

2 tablespoons maple syrup or honey

2 eggs

3 tablespoons melted butter (plus extra for greasing griddle)

1 cup roughly chopped strawberries

Directions:

Heat oven to 200 degrees.

In a large bowl, mix rice flour, corn flour, salt, baking soda, and baking powder.

In a second bowl, whisk together buttermilk, maple syrup, and the two eggs. Lastly, whisk in the melted butter. Switch to a wooden spoon and gently stir in the strawberries.

Add the wet ingredients to the dry and using the wooden spoon, gently fold the batter until it just comes together.

Heat a skillet over low to medium heat. Melt just enough butter to lightly coat the skillet. Using a ¼ cup measure, scoop a ¼ cup of batter onto the skillet. The batter is a bit thicker and doesn’t spread as easy so I found that I needed to flatten the batter a bit into a pancake with my fingers. Let it cook on the first side for about two minutes, until golden brown and cooked through. Flip and cook until golden on the second side. Place in a 200 degree oven to keep warm, if desired. Continue with remaining batter.

Serve with whipped cream and maybe rhubarb sauce if you want to be annoyingly seasonal or plain ole’ maple syrup or overkill it with some homemade strawberry jam like I did the second these pictures were done.

Makes about 8 four-inch pancakes. If you're really awesome you could probably get 10. Serves 4 to 5.

Leek Frittata

When I have no idea what to do with something or have too much of something I always turn to a frittata.

I had three huge leeks from my CSA that I had a.) no idea what to do with and b.) had too many eggs because I get a dozen a week from the CSA as well.

Boom. Done. Frittata.

Frittatas freeze really well so I’ll cut it up and throw it into plastic bags and chuck it into the freezer. Makes for a quick and easy meal when you don’t feel like cooking or have no time to pack a lunch for work. My issue is usually the latter. Love my everyday morning scramble, keeps me on my toes.

I’ve learned my lesson with the broiler one too many a time, as evidenced here. So unless I am literally sitting next to my oven (well, er, laying down, because my broiler is at the bottom, which only makes things more ridiculous) and watching the food broil, it’s always too late. So while this method I use here for the frittata takes longer, it’s completely fool proof. Me being the fool.

P.s. Easy trick for cleaning your leeks, that I think I learned from like Rachel Ray or something, prep up your leeks and then place them in a bowl full of water and sorta swish ‘em around. Let them sit for a few minutes. All the sand and grit will sink down to the bottom of the bowl. See above. Scoop out your leeks and dry.


Leek Frittata

Ingredients:

3 pieces uncured/nitrite-nitrate free canadian bacon (approximately 1 cup of cooked meat -- diced bacon or ham could work here flawlessly)

1 tablespoon of grassfed butter (plus a bit extra if needed)

3 leeks, white and pale green parts only, washed thoroughly, halved and sliced

7 eggs

¼ cup grassfed heavy cream

salt and pepper to taste

⅓ cup shredded white cheddar cheese + extra for sprinkling on top if desired

Directions:

Heat the oven to 350 degrees.

In a 10-inch cast iron skillet, fry up the three pieces of canadian bacon until golden and crisp. Take cooked meat and dice. Set aside.

Using rendered fat from the bacon, saute the leeks over a medium heat. If it doesn’t seem like there’s enough fat, use an extra bit of butter or other cooking fat. Cook leeks until they are soft and start to develop some caramelization.

While the leeks are cooking, beat together the eggs, heavy cream, and the salt and pepper. Add in the diced bacon and shredded cheddar and stir.

When the leeks are ready, remove them from the skillet and place in a separate bowl from the eggs to allow to cool just slightly. Meanwhile, turn the heat off of the skillet but add 1 tablespoon of butter right away to the hot pan so it begins to melt. Swirl the melted butter around to coat the entire pan.

Add the leeks to the egg mixture and stir to incorporate.

Add the mix to the butter coated skillet, sprinkle extra cheddar on top if desired, and throw into the oven for 40 to 45 minutes or until frittata is puffed and starting to turn golden brown.

Serves 6