Sour Cherry Oat Crumble Muffins
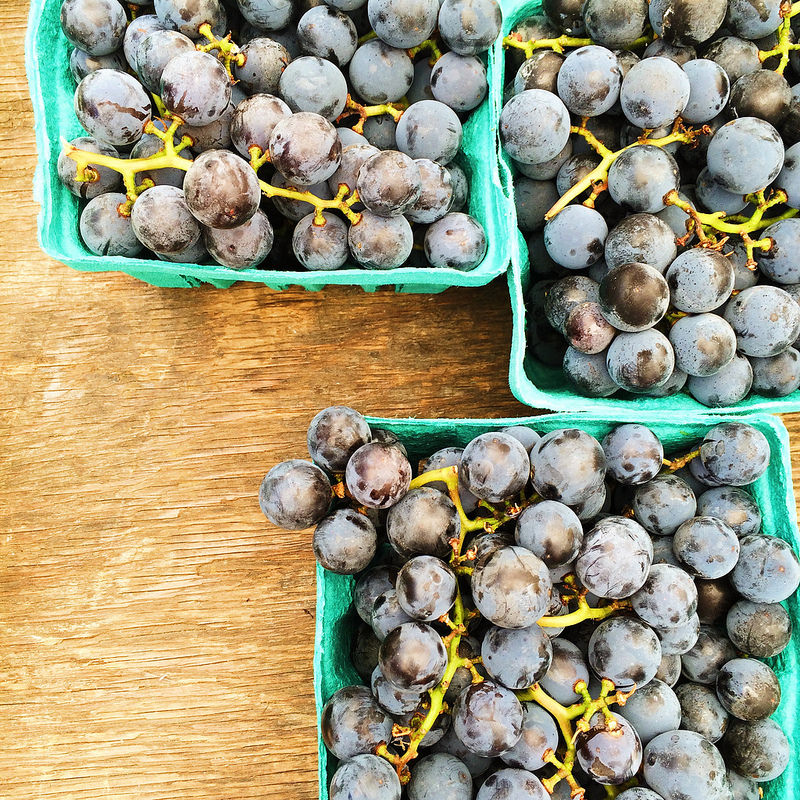
I spent the first three weeks of sour cherry season walking right on by them. Part of it was the $12 a box price tag. The other part was that I had no clue what I would do with them, so I couldn’t justify the $12 a box price tag.

muffinslast.jpg

But I finally succumbed and doled out a hefty portion of my market budget for a quart or two. Coming out on the other side of it, though, I can say it was worth it. Also as the season has lingered on the price did come down a bit.

After the cherries themselves convinced me to make some compote out of them, I tasted it and was like I’m eating exactly what I love about cherry pie. Okay, I get it. I get what the big deal is. Then it was only a matter of figuring out what to put it in that wasn’t cherry pie. Because, as I’ve already embarrassingly admitted, I don’t really like pie. 

I know...I know.

muffins3.jpg
muffins4.jpg

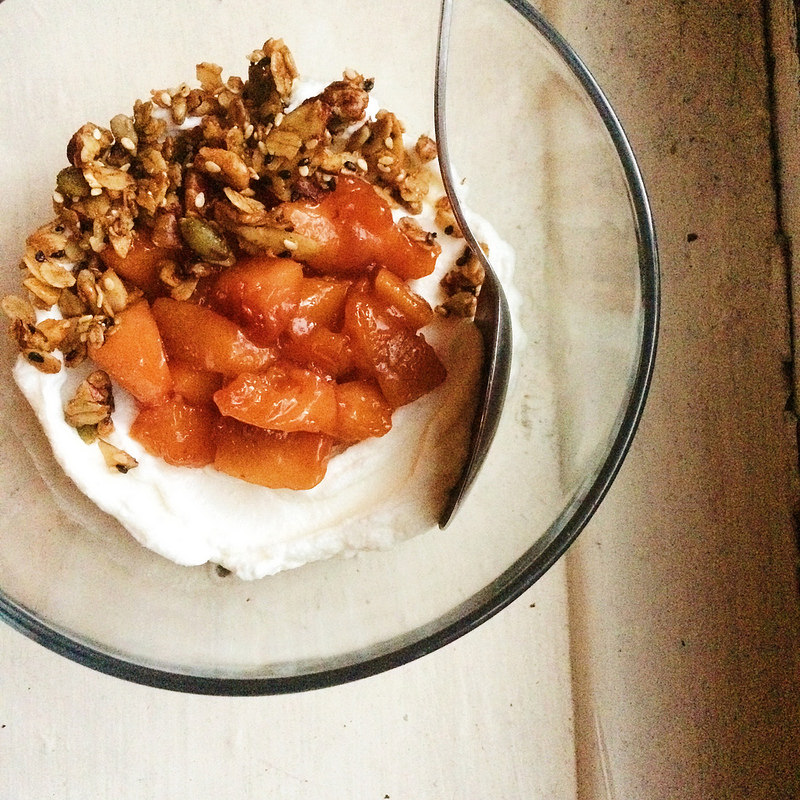
So first, these popsicles happened. But I was left with a good amount of compote still to use. Which was not really a problem. I could have left well enough alone and just had a half pint jar of it in my fridge for a few weeks to come -- to swipe on toast or swirl into yogurt or top ice cream with. What I did though, was swirl it into some muffin batter and then covered that with a crumble, because, it just made sense at the time.

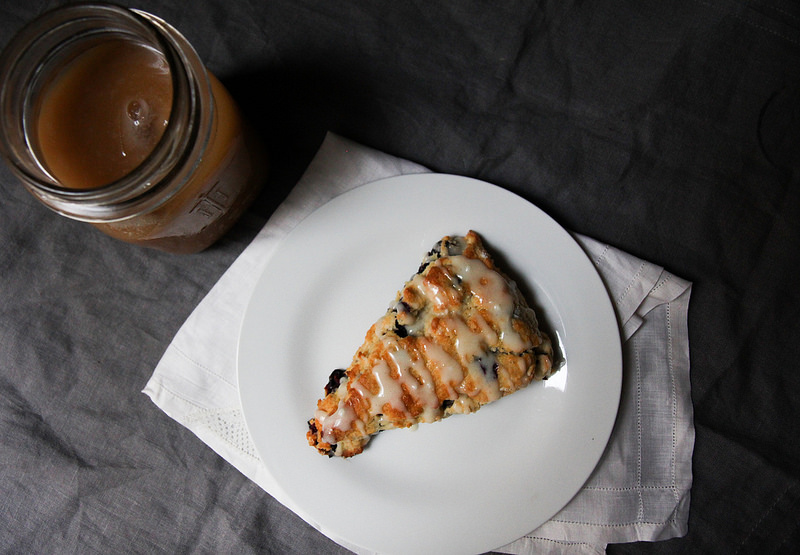
Barely sweet gluten free batter, swirled with puckery sour cherry compote, topped with buttery sweet oat crumble was definitely a good decision. Let me know if you think so too...

muffins5.jpg
muffinsfinal.jpg

Sour Cherry Oat Muffins

Adapted from this Canelle et Vanille recipe

Ingredients:

Oat Crumble:

1 cup old fashioned oats (gluten free if needed)

¼ cup coconut palm sugar (or brown sugar)

¼ cup coconut flour

pinch of salt

3 tablespoons butter

Muffins:

3 eggs

½ cup raw sugar

1 cup full fat greek or other yogurt

½ cup melted butter

1 teaspoon almond extract

1 cup brown rice flour

½ cup millet flour

2 tablespoons tapioca starch

1 tablespoon baking powder

½ teaspoon salt

1 cup cherry compote (recipe here)

Directions:

Heat oven to 350 degrees.

In a medium sized bowl combine oats, coconut palm sugar, coconut flour, and salt. Cut the cold butter into the crumble mix and mush together with your fingers or a pastry cutter until butter is mixed into the oat mixture well. It should clump if you press it together in your hands. Set aside.

In a large bowl, whisk together eggs, sugar, yogurt, melted butter,  and extract to combine well. Add flours, tapioca starch, baking powder, and salt and whisk well to combine.

Line a muffin tin with cupcake liners. Fill each wrapper about three quarters of the way with batter. Next dollop about 1 tablespoon of cherry compote onto the batter of each muffin. Take a tooth pick or other type of skewer and artfully drag the compote throughout each muffin to create swirls.

Lastly sprinkle a little bit of oat crumble on top of each muffin.

Bake in oven for about 20 to 25 minutes until they are golden brown and a cake tester comes out clean.

Note: You might have oat crumble leftover if you don’t use it all on top of the muffins. Simply line a sheet pan with some parchment paper and spread the crumble out on it. Bake it in a 350 degree oven for about 10 to 15 minutes or until golden and toasty. Once cooled, place in an airtight container and use on yogurt or ice cream like you would a granola.

Makes 1 dozen muffins.

Strawberry Cornmeal Pancakes

Once upon a time I went to film school. I spent four years studying the art of filmmaking and earning a rather questionable bachelor’s degree since our studio classes took extreme precedence over our regular humanities courses. Among the cast of characters I met along the way, my production professor was definitely the most memorable in the best way.

He had an enviable handlebar mustache, an unruly mop of charcoal grey hair, and was the type to wear sunglasses at night. He had a thick eastern European accent and was a goldmine of amazing yet basically untranslatable idioms. One of his classics was not to “confuse frogs with grandmothers” followed by “it rhymes in my language”. It tended to leave the majority of our class scratching our heads as he usually applied it any situation he felt it called for. I had an affinity for his sayings that had to do with food, for now obvious reasons. He always compared filmmaking to making soup. When he wanted you to think about something or work on something a little longer he would say, “let it simmer”. When adding to the conversation, he would “add bacon to the pan” but not because he liked bacon, but because “I just like the sizzle”.

batter2.jpg

Since starting this weird food writing journey, besides a brilliant piece of editing advice (“use the axe, not the tweezers”), the line I think of most happens to be about pancakes. When we were in film school, he was essentially applying it to first drafts of the screenplays, first takes of the shoot, first editing passes of the film. But now in my second life, I am applying his advice in the most literal manner.

Here’s what you need to know, and this is some deep shit, so get ready. It can be applied literally and figuratively as I’ve already pointed out. But basically, remember when making pancakes or anything else --- that “the first pancake is always bad”.

Oh man, it’s like the truest thing anyone has ever said. Legitimately changed my life. I think of it every.single.time. I make pancakes and never feel bad when the first one is terrible. Even these. Although I do have to say, practice can make perfect. I tend to over butter the first time around which kind of deep-frys the pancake. Sounds good in theory but that’s not what makes a perfect pancake. Low heat is important; the key to pancakes is patience. If the pan is too hot, the outside and the butter will burn, but the inside will be raw. So remember --- lower heat than you think, less butter than you think, more time than you think along with the most patience. And this, the best advice of all, remember that “the first pancake is always bad”.

Now just because I have no idea how to segue into this, can I let you in on a little secret? Not only are these pancakes so seasonal, made from mostly local ingredients, quite possibly organic and totally gluten free --- they’re also birthday pancakes. June 29th was sizzle & sass kitchen’s first birthday. Since my first post, every day behind the stove, the camera, and the keyboard in the pursuit of this site has never felt more right. This project has turned into a full-on passion and there’s really nothing I’d rather do with my days. Thank you to those of you who take the time to read these posts. Here’s to many more! Let’s toast with these pancakes.


Strawberry Cornmeal Pancakes

adapted from this smitten kitchen recipe

Ingredients:

¾ cup rice flour

¾ cup fresh milled organic fine ground corn flour

½ teaspoon sea salt

½ teaspoon baking soda

½ teaspoon baking powder

1 cup buttermilk

2 tablespoons maple syrup or honey

2 eggs

3 tablespoons melted butter (plus extra for greasing griddle)

1 cup roughly chopped strawberries

Directions:

Heat oven to 200 degrees.

In a large bowl, mix rice flour, corn flour, salt, baking soda, and baking powder.

In a second bowl, whisk together buttermilk, maple syrup, and the two eggs. Lastly, whisk in the melted butter. Switch to a wooden spoon and gently stir in the strawberries.

Add the wet ingredients to the dry and using the wooden spoon, gently fold the batter until it just comes together.

Heat a skillet over low to medium heat. Melt just enough butter to lightly coat the skillet. Using a ¼ cup measure, scoop a ¼ cup of batter onto the skillet. The batter is a bit thicker and doesn’t spread as easy so I found that I needed to flatten the batter a bit into a pancake with my fingers. Let it cook on the first side for about two minutes, until golden brown and cooked through. Flip and cook until golden on the second side. Place in a 200 degree oven to keep warm, if desired. Continue with remaining batter.

Serve with whipped cream and maybe rhubarb sauce if you want to be annoyingly seasonal or plain ole’ maple syrup or overkill it with some homemade strawberry jam like I did the second these pictures were done.

Makes about 8 four-inch pancakes. If you're really awesome you could probably get 10. Serves 4 to 5.

What I Really Eat: Quick Chicken Francese

"What I really eat" are my Iron Chef meals. My pantry meals. Shit, my fridge is empty meals. The things that come out of necessity and lack of time. The ingredient list will usually be small and the execution usually simple. Something that is less of a recipe and more of a guideline. If something exceptionally awesome comes out of my Sunday night scramble, it will get posted as a “What I Really Eat” and probably be accompanied with a not-my-best photo.

Realistically I’ll realize about an hour before we should eat dinner that I’ve never taken the pack of chicken out of the freezer that I wanted to use. It’s then a mad dash to thaw chicken totally improperly so I can start cooking with it. At some point I acknowledge that whatever grand semi-plans I had for dinner need to be completely abandoned because I’ve wasted an hour of valuable time waiting for the chicken to not be a solid block of ice.

So we wait a little bit longer for the chicken to thaw. I don’t know if you know this, but like the watched pot never boils, the chicken never thaws. Then we slice each breast in half (it still being a little icy actually makes this easier.) Pound it thin with a meat mallet. Even though they’re still stupid cold, they’ll be so thin they will fry up quickly after a dredging of starch and egg. Deglaze the pan with chicken broth and lemon juice, reduce it to thicken and make it silky with butter. Pour over chicken. Shower with parsley. Done.

This is all practically 15 minutes after slicing the first breast open.

The takeaway: defrost your chicken in time for dinner. Or like me: ditch the original plan and make a dinner that only takes 20 minutes.


Quick Chicken Francese

Ingredients:

1 pound chicken cutlets, pounded thin

2 tablespoons tapioca starch or corn starch (can sub 1/4 cup flour to dredge instead, if desired)

1 egg

olive oil for sauteing

1 cup chicken broth

1 lemon, halved -- juice one half and thinly slice the other

1 tablespoon of butter

salt and pepper

2 tablespoons of chopped parsley

Directions:

Salt and pepper the cutlets. Dredge each in the tapioca starch and put aside on a plate. Beat the egg in a medium sized bowl.

Coat the bottom of a large saute pan with olive oil over medium heat. Once starting to smoke dredge the tapioca starched cutlets in the egg wash and place in the pan to brown. Let chicken cook on one side until golden brown. Flip and cook second side until browned and cooked through. Saute chicken in batches if needed. Set chicken aside.

Deglaze the pan with the chicken broth scraping up the brown bits on the bottom of the pan. Add the juice of half the lemon. Let this reduce down by half, about 5 minutes. In little pieces melt in the tablespoon of butter. Add the lemon slices to the sauce. Season with salt and pepper to taste.

Put chicken on a serving plate and then pour the pan sauce over. Sprinkle with chopped parsley.

Serves 4


Rhubarb Swirl Cake

I took several lessons straight to heart as a young Connecticut country kid. One was that foraging for random things in the woods was a great way to get poison ivy on your hands (oh the misery). And that running around barefoot all summer in the clover covered lawn was a guarantee of many bee stings to the toes, which I now file under -- wish that was still a problem. And lastly – don’t ever, ever eat rhubarb’s toxic leaves.

My good friend Sarah, another city transplant who grew up in the fields of Connecticut’s countryside, said she also remembered foraging for rhubarb in the springtime. Once snatched up, she would dip the raw stalk briefly into the sugar bowl before each bite. (Pro tip)

Even now, I could lead you by the hand with my eyes closed to the place where the rhubarb grows. Each spring it matures in an uncultivated space on the right side of my mother’s garden, just outside the fence. There, it mingles with weeds, and grasses, and pricker bushes, waiting to be plucked and tucked into something sweet.

The rhubarb arriving every year was something I always looked forward to. The deep satisfaction of the seasons changing seemed to be important to me, even then. It’s arrival meant that the weather was getting warmer, school was almost over, summer was so close you could smell it. It meant that we were going strawberry picking so soon. However, I have no associations with actually consuming it. You see, my mother never really did anything with her rhubarb.

I wish I could tell you all that I have fond memories of strawberry rhubarb pies swirling around in my springtime memories of growing up. But in truth, it seems my mama wasn’t ever too big on pie. Which is why I’m probably not too big on pie. I have no consistent culinary memory link to it. I have one vague recollection of her making a crisp.

Rhubarb was one of the first things I picked up at the farmer’s market last year when I started going. I picked it up with only faint purpose since I had no idea what I was going to do with it. I knew it was seasonal, I knew it was fleeting and still --- those seem to be only two things I need to know to spend my entire savings account at a market stand. I ended up making this. And then I made it a few more times with the rhubarb I’d begged my mother to pick from her garden and freeze for me. A few weeks ago when I was not-so-patiently waiting for rhubarb and strawberries to show up, buried within my too full freezer I discovered a baggie of both rhubarb and strawberries from last summer --- a bonafide win. They soon found themselves stirred into a pot with some vanilla to make some more. I have new associations and now (strawberry) rhubarb compote means that spring is here.

Once I finally got my hands on some actual rhubarb, swirling some saucy fresh stuff into some cake was definitely an upgrade. Say you want those swirls even more shockingly pink, (if you couldn’t tell by my instagram feed), strawberries are here people(!!!) Use this compote recipe to swirl in instead. I, however, really liked the puckery rhubarb all by itself. I also love this rhubarb sauce’s demure shade of pink. Almost like it’s not quite calling attention to itself until it hits your tongue and it’s an explosion of pleasant tartness.


Rhubarb Swirl Cake

adapted from this recipe by Cannelle et Vanille

Yield: 1 nine inch square cake

Ingredients:

Rhubarb sauce:

2 cups diced rhubarb

½ cup raw sugar

juice of half a lemon

Cake:

3 eggs

1 cup raw sugar

1 cup full fat greek yogurt

1/2 cup melted unsalted butter

1 teaspoon vanilla

1 cup white rice flour

1/2 cup millet flour

2 tablespoons tapioca starch

1 tablespoon baking powder

1/2 teaspoon salt

powdered sugar for sprinkling (if desired)

Directions:

In a small saucepan over low to medium heat stir together the diced rhubarb, ½ cup of sugar, and the lemon juice. Stir occasionally. Keep at a simmer. It will take about 30 minutes for the rhubarb to breakdown and come to desired consistency. Once it is thick and jammy, turn off heat and allow to cool down a bit.

Heat oven to 350 degrees.

Line a 9-inch square cake pan with parchment paper.

Set aside.

In a large bowl, whisk together the eggs, sugar, yogurt, melted butter, and vanilla extract.

Add in the white rice flour, millet flour, tapioca starch, baking powder and salt. Whisk again to thoroughly incorporate.

Pour into the cake pan and spread it out evenly.

Dollop four thick lines of the rhubarb compote onto the top of the batter. Using a toothpick, knife, or skewer drag through the rhubarb lines to create a swirling design throughout the top of the cake.

Bake cake for 40 to 45 minutes minutes or until it’s edges have turned golden brown and a cake tester comes out clean.

Let cake cool in pan. Using the edges of the parchment paper, lift the cake out of the pan. Dust with powdered sugar, if desired. Cut into squares.

Note: You will probably have some rhubarb compote left over. Swirl it into other things like yogurt or ice cream or oatmeal. Sometimes I just eat it with a spoon, but that’s just me.

Roasted Ramp Ricotta Pasta

I keep buying ramps. I keep buying them like I have the faintest clue what to do with them. Sometimes I think I am just buying them for the sake of their seasonality. I know they’re only here for a short time and I mean, everyone else is buying them…

Where’s a mom with her sayings about bridges?

Instagram was telling me that I could just roast them and end it there. Perhaps poach an egg and call it a night. Instagram was also really selling ramp pesto. I wanted to do something else, truth be told I’m not that big on pesto.

Sometimes a new experience, a new adventure, a new place can serve as inspiration. 

And sometimes that place is Brooklyn.

Since the weather’s been getting nicer, my boyfriend and I have been really diligent about going to different areas of the city and just ‘splorin on the weekends. We’ve both lived here alotta years but feel like there are whole parts of the city we’ve never seen. Two Saturdays ago we spent the entire afternoon and night walking all over Greenpoint and Williamsburg, Brooklyn. Iced coffees were slurped, comfort food was had, ice cream was discovered, a frisbee was tossed, sunset was seen with toes in the grass. We didn’t want the day to end so we wandered around again until we found a cute little restaurant to grab some matching whiskey on the rocks.

Since we were still full from a heavy lunch, we sat at the bar and just sipped on our Jamesons, but I couldn’t help but look at the menu anyway. Just as I was thinking that the next day I really had to come up with a way to use those ramps --- I spotted a ricotta ramp pasta on the specials menu that sounded completely inspiring. Very springy, very simple sounding, very much something I thought I could replicate with some adaptations here and there.

So I figured out what to do with those ramps.

Watch those roasting ramps carefully! My first time roasting ramps I lost the poor things. Burnt to a crisp. RIP. A little char on the ends is a nice contrast but otherwise you just want them to soften and caramelize a bit. Also, can I just say you’re not doing it right if you’re not covered in dirt and leaves when dealing with your ramps. Clean them very well. They have a lot of crevices and those crevices have mud in them.

If you can find fresh peas, bless you -- USE THEM. I made do with some frozen ones.

And by all means, you can use whatever type of pasta you like, I used a gluten-free, “paleo” pasta by Cappello’s.

Last note, you probably won’t use the entire batch of ramp ricotta, but I can assure you I didn’t have a hard time figuring out how to use the rest. I may have spread it on some toast with roasted red peppers and pepitas. I also may have folded it into some meatballs


Roasted Ramp Ricotta Pasta

inspired by a special at Juliette

Ingredients:

1 bunch ramps, trimmed of ends and cleaned very well

olive oil for roasting

salt and pepper

8 oz ricotta (about 1 ½ cups)

¼ cup chopped fresh parsley

½ cup diced bacon

1 cup fresh or frozen peas

1 box Cappello’s Fettucine (or approximately 8 oz fresh pasta / 4 oz dry pasta)

squeeze of half a lemon

shredded parmesan for sprinkling (if desired)

Directions:

Heat oven to 350 degrees.

In a roasting pan, spread ramps out evenly amongst each other. Drizzle well with olive oil and season with salt and pepper. Roast for about 15 to 20 minutes. Begin checking them at around 10 minutes to ensure they do not burn.

While ramps are roasting, begin preparing the other components. Fill a medium sized saucepan with salted water and begin bringing it to a boil for the pasta. In a small bowl fold the majority of the chopped parsley into the ricotta, reserve a bit of the parsley for garnish if desired.

Once the ramps have finished roasting, remove from oven and let sit for a bit until cool enough to handle. Meanwhile begin to render out the bacon in a pan over medium heat. Once bits are close to getting nice and crispy, toss in the peas. Cook the peas until just warmed through and bacon is nice and brown. Remove from heat.

Take the cooled ramps and give them a nice chop. Fold the chopped ramps into the ricotta mixture. Then season it with salt and pepper to taste.

Now that all your components are ready, prepare the pasta. If you’re not using the Cappello’s pasta or a fresh pasta, do your best to accommodate for the cooking time of dry pasta. Cappello’s or fresh pasta only takes about a minute to cook, so I always cook it last.

As soon as pasta is done cooking, reserve a bit of the cooking water, drain the pasta and dump it into a large mixing bowl. Immediately add about 1/2 to 3/4 cup of the ricotta mix to the pasta. Add the bacon, peas, and some of the bacon fat to the bowl as well. Begin to toss together. I find that using a pair of tongs helps to turn the pasta into the mix gently. If you feel it needs a bit of help becoming saucy add a touch of the reserved cooking water until it’s the desired consistency. A squeeze of lemon at the end helps brighten the whole thing up.

Serve with a sprinkling of chopped parsley and shredded parmesan.

Serves 4

What I Really Eat: Migas Style Breakfast Tacos

"What I really eat" are my Iron Chef meals. My pantry meals. Shit, my fridge is empty meals. The things that come out of necessity and lack of time. The ingredient list will usually be small and the execution usually simple. Something that is less of a recipe and more of a guideline. If something exceptionally awesome comes out of my Sunday night scramble, it will get posted as a “What I Really Eat” and probably be accompanied with a not-my-best photo.

Having not encountered much Tex-Mex growing up, I didn’t learn the genius of migas until I was watching the special features section for the movie Sin City. I was a bonafide film nerd growing up (I even went to film school!) so it was normal for me to pour over the special features of any movie I came across. Here is where Robert Rodriguez solidified himself as both a favorite director and a serious crush factor. He makes movies? He cooks? And eggs for dinner at that? Sold. I’m sold.

(I highly suggest watching his other cooking school videos. As he wisely says "not knowing how to cook is like not knowing how to f...just watch the videos.)

My love of migas has now totally and completely been cemented since I began visiting friends in Austin, Texas. One night while everyone else was drunkenly digging into some deliciously sloppy nachos, I was happily inhaling migas breakfast tacos at one in the morning.

These should work for all your come-home-a-bit-tipsy midnight snack needs, breakfast for dinner indulgences, and are just as appropriate for the time of day when eggs are usually consumed. They would make an awesome assemble-your-own brunch item. I’ve even packed them up for “not a sad desk lunch". Eaten cold from the fridge with my fingers? Guilty.

These of course would be much more simple without all the frying of various carb sources, but it’s the crunch of the tortillas that gets me every.single.time. More power to you if you make your own tortillas, recipe is in the video link. I’ve done it before and it is for sure worth it. When I’m just looking to stuff my face though, some organic sprouted corn tortillas I found at Whole Foods have been doing the trick just fine. If you do watch the video, I did adapt the recipe to essentially combine the two different tacos he makes. Believe you me, when tomatoes are in season again, those are going right on in.

I don’t believe in Cinco de Mayo, but I do believe in tacos. Here’s my contribution to the “holiday”.


Migas Style Breakfast Tacos

adapted from Robert Rodriguez’s 10 Minute Cooking School

Ingredients:

¼ cup olive oil for frying

2 smallish yukon gold potatoes, diced

2 corn tortillas, cut into ½ inch squares

2 tablespoons butter

1 onion, diced

1 jalapeno, ribs and seeds removed and minced

6 eggs

splash of heavy cream or whole milk

salt and pepper

6 additional corn tortillas for serving

sliced avocado

hot sauce to taste

Directions:

In a medium sized skillet heat up approximately a ¼ cup of olive oil over medium heat. Once the oil is hot enough add diced potatoes to oil. Fry up until golden brown on all sides and soft when pierced with a fork. Remove from oil and set on a paper towel lined plate to drain, sprinkle with salt to taste.

Add cut up tortillas to the same oil, watch these carefully they will brown up quickly. Fry until completely golden brown. Turn off heat and add to paper towel lined plate to drain. Sprinkle with salt to taste.

In a different skillet or the same with oil cleaned out, heat 1 tablespoon of butter over medium high heat. Once melted add onion and jalapeno to the pan. While the vegetables are cooking, beat the 6 eggs with the splash of heavy cream and salt and pepper until combined.

When onion and pepper are getting soft and starting to caramelize, crank up the heat to high and add the remaining tablespoon of butter. Swirl to coat pan. When butter is melted and starting to brown, add the eggs to the hot pan. Let eggs begin to set on the bottom and then quickly add the potatoes and fried tortillas to the eggs. Start to pull the eggs away from the sides of the pan as you would scrambled eggs. Continue to cook eggs until the desired consistency. Remove from heat and plate.

Here’s where you do you. To serve, if you want lightly warm a tortilla then scoop a bit of the eggs into it. Top with avocado and hot sauce to taste. Proceed to stuff face.

Serves 4 to 6

Kale & Sausage Dinner Tart with Cheesy Rice Crust

So, it’s Saturday. Not Friday, when this post was supposed to go up. And I have no excuse really. I just suck. But let’s not focus on that right now, let’s focus on this tart, pie thing.

Pie. This was Sausage Pie. And it was glorious.

I’m using the past tense here, because that beautiful thang is long since gone, and I may or may not be still mourning it’s end. The lovely smell of sausage filled my kitchen for the better part of a day and it was heaven. Heaven, I tell you.

I can not take full credit for the ideas, I found both recipes at different times on Food52. But then I had the "genius" (um, common sense) idea to put them together. So la di da. I adapted lightly here and there to adjust for what I had on hand. Most especially there is a lot more sausage in here than the original recipe which I like to think is an improvement. I carnivore, therefore, I am. I am also not the type of person who typically has wine on hand for throwing into recipes. Do you think of me differently now? Chicken stock (from da freezer!) sufficed.

crustbaked.jpg

What is actually genius is the vision to smash leftover rice into a crust for a flawless gluten free alternative to tart dough. So thanks for that, Food52. Writing about this makes me want to make it all over again. Next time, I’d go all out and use hot italian sausage instead. Nice and sassy like.


Kale & Sausage Dinner Tart with Cheesy Rice Crust

Ingredients:

Crust:

lightly adapted from this recipe at Food52

1 ½ cups cooked rice

¼ cup shredded parmesan

¼ cup white cheddar

1 egg white

salt and pepper to taste

Tart filling:

lightly adapted from this recipe at Food52

1 pound sweet italian sausage

1 onion, chopped

2 cloves garlic, minced

1 bunch kale, cut into 1 inch pieces

¼ cup chicken stock

¼ cup ricotta

2 eggs beaten

salt and pepper to taste

shredded parmesan for sprinkling (optional)

Directions:

Heat oven to 425 degrees

In a large mixing bowl, mix together rice, cheeses, egg white, and salt & pepper until well combined. Mixture should be sticky enough to hold together if you squeeze it lightly in hands.

Press mixture evenly into a 9-inch pie pan. Par bake in oven for 10 to 12 minutes. Remove from oven and cool slightly.

Lower heat to 400 degrees.

Brown sausage in a large skillet over medium heat. Once cooked, remove from pan and set aside in a large mixing bowl. In the fat from the sausage, add onion to the pan and saute until translucent and beginning to caramelize. Add garlic to pan and cook just until fragrant, about 30 seconds. Add kale to pan and cook until wilted, 5 to 10 minutes. Add chicken stock to pan and cook until reduced just slightly, scraping up any brown bits from the bottom of the pan as you go. Remove from heat and add to bowl with sausage. Stir to combine. Allow to cool slightly.

Once cooled, about 5 minutes, add ricotta, eggs, and salt & pepper. Stir to combine well and then pour into prepared crust. Spread out evenly. Sprinkle top with shredded parmesan if desired.

Bake in oven for about 15 to 20 minutes or until crust has browned a bit on the edges.

Once removed from oven, leave to cool a bit and set.

Serves 8

Broccoli Cauli-Rice Chicken Bake

IMG_2395.JPG

Sometimes in life you just need to eat a big bowl of comfort. Amirite? Or amirite?

Even though it’s warming up a bit this week, the Northeast lately has generally been fucking cold. The boyfriend and I hadn't realized until recently that our crappy old radiator in the living room had been essentially OFF for the past two winters. Oops. So until we came to our senses a few weekends ago, I had been serving us terribly comfy and warming dinners while we plunged into another weekend “Wire” binge-a-thon.

This was one of those meals. I mean, what’s more comforting than what’s essentially a heaping bowl of thickened heavy cream? Listen, there are vegetables and lots of protein in there so it’s decidedly virtuous. Especially more so than a bowl of cheese sauce and noodles. Don’t get me wrong, I have nothing against macaroni and cheese. I am the damn queen of macaroni and cheese. I am known for my macaroni and cheese. But on a regular old weekday or weekend night, I feel better about digging my frostbitten fingers into lots of vegetables with cheese sauce rather than cheese covered carbs.  

P.s. Don’t let that unassuming yellow hued iPhone photo dissuade you from making this exceptionally cozy dish. It’ll warm you right up.

p.p.s I just added a  "Subscribe" feature on the sidebar to the right! If you'd like to be notified when a new recipe is up, just type in your email address and hit subscribe and you'll get an email each time I post! Also don't forget you can also add me on instagram, facebook, pinterest and twitter! 


Broccoli Cauli-Rice Chicken Bake

Ingredients:

2 chicken breasts with skin and bone (or about 2 cups cooked chicken)

olive oil

salt and pepper

1 head broccoli

1 head cauliflower

1 ½ cups heavy cream

1 teaspoon dijon mustard

1 cup shredded cheddar cheese

¼ cup shredded parmesan

½ cup shredded cheddar cheese for sprinkling the top

Directions:

Heat oven to 400 degrees

Roast chicken breasts in oven seasoned well with salt and pepper and drizzled in olive oil until cooked through and golden brown. About 40 to 45 minutes. ***(Or just use leftover cooked chicken, about 2 cups OR no need to use chicken at all! I used chicken to bulk this up to a main, you can leave the chicken out and serve as a side!)

Line a sheet tray with parchment paper.

Cut your broccoli into smallish florets and “rice” cauliflower in a food processor or using a box grater until you have approximately 2 cups worth.

Spread half the pan with the riced cauliflower and the other half of the pan with the broccoli, drizzle vegetables with olive oil and season with salt and pepper. Throw into the oven with the chicken for about the last 20 minutes of the chicken’s cook time.

While chicken and vegetables are roasting, get cream reducing down in a small sauce pan over a medium to low heat. Season cream with salt, pepper and mustard and stir continuously. Using a whisk is best. Keep cream at a simmer, try to keep it from boiling. It will take about 15 minutes to start to thicken a bit. Once it’s pretty hot and starting to get thick, add in the shredded cheeses. Whisk cheeses into hot cream until they've melted into a creamy thick cheese sauce. Taste for seasoning. Remove from heat.

Remove chicken and vegetables from oven once done. Chicken should be a light golden brown and cooked through. Vegetables should be starting to get caramelized.

Lower oven heat to 350 degrees.

After removing the bones, shred the cooked chicken into bite size pieces and add to ovenproof casserole dish. To the chicken, add roasted broccoli florets and about 2 cups of the riced roasted cauliflower. Give this a good stir to distribute the chicken and veggies evenly. Pour the cheese sauce over the chicken and vegetables and stir again to distribute cheese sauce evenly. Sprinkle remaining ½ cup of shredded cheddar over the top of the casserole.
Bake for 30 to 40 minutes or until the top is a delightful golden brown.

Serves 6

(Reheats and freezes well)