Sour Cherry Almond Yogurt Popsicles

I want to love pie. I really, truly, desperately do want to love pie.

I appreciate pie. I appreciate pie in the sense that I know how much blood, sweat, and tears usually go into making pie. That, and they are just so pretty. I love the aesthetics of pie. The crinkled edges, the handiwork of the lattice, the snappy looking sugary top. Give me a piece of pie and I will fawn over it like it just won the county prize at the fair.

Expect me to eat that prize winning slice and I will proceed to scoop out and only eat what’s inside the pie. So what I really love is the fruit. That warm, syrupy, drippy fruit.

So when faced with a quart or two of perfectly perfect bright red sour cherries and not even one inkling need to make pie, what’s a girl to do? Of course I only bought the cherries because what kind of seasonal blogger would I be if I didn’t. I had a stare down with my quart of cherries and eventually they convinced me to just throw them into a saucepan with some sugar and almond extract, because when in doubt, make compote.

Consequently I ended up with a bunch of warm, syrupy, drippy fruit which is exactly what I like. Those saucy cherries then talked me into swirling them into a couple things, including these yogurt popsicles, but none of them pie.


Sour Cherry Almond Yogurt Popsicles

Ingredients:

Cherry compote:

1 quart sour cherries (approximately 2 pounds), pitted

⅓ cup raw sugar or other sweetener

juice of half a lemon

1 teaspoon almond extract

1 teaspoon tapioca starch (or cornstarch)

Yogurt Base:

1 cup plain greek yogurt

½ cup whole milk

2 tablespoons honey

1 teaspoon almond extract

Almond crust (optional):

½ cup roughly chopped sliced lightly toasted almonds

Directions:

In a 2-quart saucepan over medium to low heat, bring cherries, raw sugar, and lemon juice to a simmer. Cook for about 25 minutes until cherries have broken down and released their juices. When they’ve reached the correct consistency, stir in the almond extract. Lastly scoop about a ¼ cup of juice from pot into a small dish. Whisk the starch into this juice and once combined quickly add back to the cherry pot. Stir well to incorporate. Once the juice has thickened into a syrup, remove from heat and let cool.

Once cooled, blitz briefly in a food processor or blender until mostly but not fully pureed. A few chunks of cherry are welcomed.

While the compote is cooling, get the yogurt base ready. In a large bowl, whisk yogurt, milk, honey and almond extract until smooth. Keep chilled until compote is cooled.

To assemble pops: pour about an inch of yogurt base into each of six pop molds. Next layer in one heaping tablespoon of cherry compote into each. Finish each with another layer of yogurt base, leaving about ¼ inch at the top of each mold to accommodate for expansion. Next take a popsicle stick and artfully drag the cherry compote through the yogurt mix of each popsicle mold. You should be able to create some pretty swirl action for each pop.

Get your popsicle mold ready for the freezer by placing on covers, adding popsicle sticks, etc.
 

Freeze for 4 to 5 hours or until fully frozen. Run under warm water to loosen.

If desired, let the pops begin to melt just slightly, and then roll in chopped almond slices to coat. Enjoy right away or return to freezer to be enjoyed at a later time.

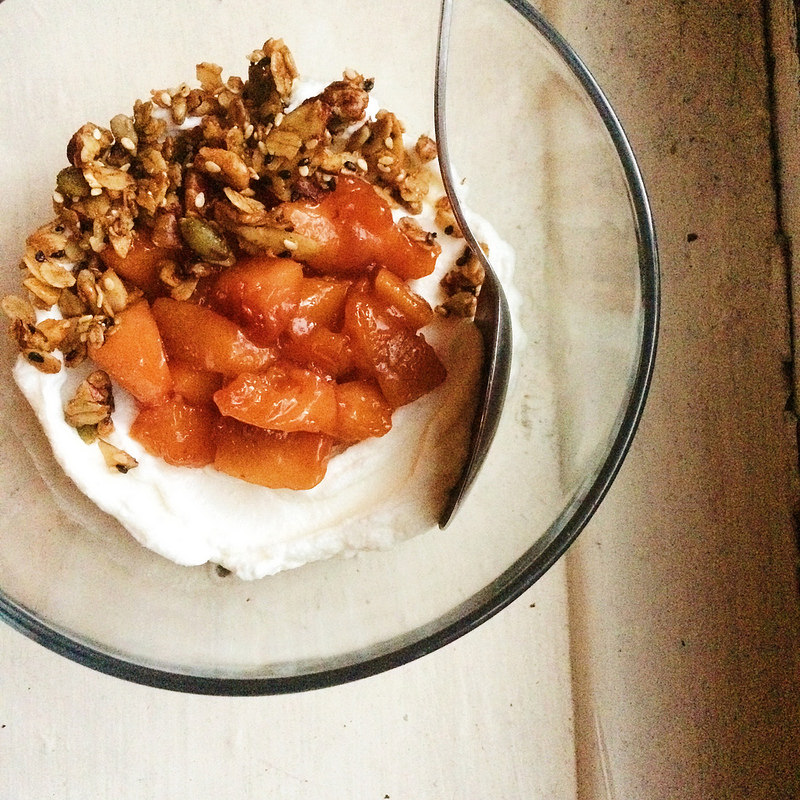
Note: You will have compote leftover. I promise that having left over cherry compote is not a problem. I’ve been swirling it into plain yogurt for a sweet snack. Swiped on some toast, waffles, or pancakes would be great. I have no doubt that spooning it over vanilla ice cream would be divine. This cake would welcome the addition.

Makes six 8-ounce popsicles.

Rhubarb Swirl Cake

I took several lessons straight to heart as a young Connecticut country kid. One was that foraging for random things in the woods was a great way to get poison ivy on your hands (oh the misery). And that running around barefoot all summer in the clover covered lawn was a guarantee of many bee stings to the toes, which I now file under -- wish that was still a problem. And lastly – don’t ever, ever eat rhubarb’s toxic leaves.

My good friend Sarah, another city transplant who grew up in the fields of Connecticut’s countryside, said she also remembered foraging for rhubarb in the springtime. Once snatched up, she would dip the raw stalk briefly into the sugar bowl before each bite. (Pro tip)

Even now, I could lead you by the hand with my eyes closed to the place where the rhubarb grows. Each spring it matures in an uncultivated space on the right side of my mother’s garden, just outside the fence. There, it mingles with weeds, and grasses, and pricker bushes, waiting to be plucked and tucked into something sweet.

The rhubarb arriving every year was something I always looked forward to. The deep satisfaction of the seasons changing seemed to be important to me, even then. It’s arrival meant that the weather was getting warmer, school was almost over, summer was so close you could smell it. It meant that we were going strawberry picking so soon. However, I have no associations with actually consuming it. You see, my mother never really did anything with her rhubarb.

I wish I could tell you all that I have fond memories of strawberry rhubarb pies swirling around in my springtime memories of growing up. But in truth, it seems my mama wasn’t ever too big on pie. Which is why I’m probably not too big on pie. I have no consistent culinary memory link to it. I have one vague recollection of her making a crisp.

Rhubarb was one of the first things I picked up at the farmer’s market last year when I started going. I picked it up with only faint purpose since I had no idea what I was going to do with it. I knew it was seasonal, I knew it was fleeting and still --- those seem to be only two things I need to know to spend my entire savings account at a market stand. I ended up making this. And then I made it a few more times with the rhubarb I’d begged my mother to pick from her garden and freeze for me. A few weeks ago when I was not-so-patiently waiting for rhubarb and strawberries to show up, buried within my too full freezer I discovered a baggie of both rhubarb and strawberries from last summer --- a bonafide win. They soon found themselves stirred into a pot with some vanilla to make some more. I have new associations and now (strawberry) rhubarb compote means that spring is here.

Once I finally got my hands on some actual rhubarb, swirling some saucy fresh stuff into some cake was definitely an upgrade. Say you want those swirls even more shockingly pink, (if you couldn’t tell by my instagram feed), strawberries are here people(!!!) Use this compote recipe to swirl in instead. I, however, really liked the puckery rhubarb all by itself. I also love this rhubarb sauce’s demure shade of pink. Almost like it’s not quite calling attention to itself until it hits your tongue and it’s an explosion of pleasant tartness.


Rhubarb Swirl Cake

adapted from this recipe by Cannelle et Vanille

Yield: 1 nine inch square cake

Ingredients:

Rhubarb sauce:

2 cups diced rhubarb

½ cup raw sugar

juice of half a lemon

Cake:

3 eggs

1 cup raw sugar

1 cup full fat greek yogurt

1/2 cup melted unsalted butter

1 teaspoon vanilla

1 cup white rice flour

1/2 cup millet flour

2 tablespoons tapioca starch

1 tablespoon baking powder

1/2 teaspoon salt

powdered sugar for sprinkling (if desired)

Directions:

In a small saucepan over low to medium heat stir together the diced rhubarb, ½ cup of sugar, and the lemon juice. Stir occasionally. Keep at a simmer. It will take about 30 minutes for the rhubarb to breakdown and come to desired consistency. Once it is thick and jammy, turn off heat and allow to cool down a bit.

Heat oven to 350 degrees.

Line a 9-inch square cake pan with parchment paper.

Set aside.

In a large bowl, whisk together the eggs, sugar, yogurt, melted butter, and vanilla extract.

Add in the white rice flour, millet flour, tapioca starch, baking powder and salt. Whisk again to thoroughly incorporate.

Pour into the cake pan and spread it out evenly.

Dollop four thick lines of the rhubarb compote onto the top of the batter. Using a toothpick, knife, or skewer drag through the rhubarb lines to create a swirling design throughout the top of the cake.

Bake cake for 40 to 45 minutes minutes or until it’s edges have turned golden brown and a cake tester comes out clean.

Let cake cool in pan. Using the edges of the parchment paper, lift the cake out of the pan. Dust with powdered sugar, if desired. Cut into squares.

Note: You will probably have some rhubarb compote left over. Swirl it into other things like yogurt or ice cream or oatmeal. Sometimes I just eat it with a spoon, but that’s just me.

Winter Fruit Salad

It’s a shame that fruit salads pretty much go by the wayside the moment it gets colder than 60 degrees outside. I guess it’s just one of those lovely, light, refreshing type things that makes hot summer days that much more bearable. Summer is fruit salad’s time to shine.

However, some of my favorite fruits come into season once the mercury drops below 50 up here. I’ve always had an affinity for tart and puckering fruits and citrus. I was shocked to learn that the majority of people I’ve met in my adult life did not know what a grapefruit spoon was. I was even more floored and slightly disgusted by the people who did know what a grapefruit spoon was but admitted to sprinkling the fruit with sugar first. One might say it defeats the purpose?

After Thanksgiving sins, I really felt like a fresh clean slate and all the newly seasonal fruits were calling my name, this is how this salad was born. Lightly sweet, but at times tart, totally refreshing, and the pomegranate seeds give a nice crunch. The acid from the dressing and the grapefruit also soften the apple slices as the salad sits. I think that the salad looks really pretty with all the slices and segments, but to make for an easier spoonful, giving the apples and grapefruit a cut down in size might make things more bite friendly.

If you wanna be “that person” at the holiday party, by all means, this is perfect. It’s so darn pretty and it would be a nice break from the general heaviness of holiday party eats, if, of course, someone decides to take the chance. You know what I mean by “that” person, right? The person who brings fruit salad to what is essentially a calorie-carb free for all. Those events are usually a “give me all the cookies, cream sauce, and butter you have” type of situation. I can’t guarantee that this beautiful thing won’t be largely ignored among the other goodies on the dessert table. Call it a palate cleanser if you will. Regardless, it’s even better the next day, so it’s a great make ahead dish. Oh! And wouldn’t this be a nice combo in a winter sangria?  

allmixedup.jpg

I do plan on bringing this to a holiday shindig this weekend! So I will be that person (I’ll let ya know how it goes!) But by that person, I mean that I will also be bringing a cake that has nearly two sticks of butter and enough sugar in it to kill a small pony. It’s all about balance people.


Winter Fruit Salad

Ingredients:

1 teaspoon honey

2 tablespoons fresh lemon juice

4 clementines, peeled and segmented

1 grapefruit, peeled and segmented (Video on segmenting citrus! So helpful!)

1 apple, cored and thinly sliced

1 pomegranate’s worth seeds

In a small bowl whisk together lemon juice and honey.

Add all fruit to a large bowl and pour the lemon-honey dressing over the fruit. Gently mix to combine, careful not to break up the fragile grapefruit segments. Serve cold and if there is time, let it sit before serving to meld and get juicy!

**Note on this since I've made it a few more times since originally posting: there's no real need for the dressing. It does add a layer of flavor for sure, but let's just say you're out of lemons or don't have honey or are watching for added sweeteners -- just leave it out. The grapefruit provides a nice base layer of juice. Also I've been subbing in orange segments for the clementines and I haven't looked back. ---M


Squash Pudding

sqpudding.jpg

Thanksgiving is hands down my favorite holiday.

I think we were about 14 years old when my best friend Deborah and I were invited to eat at the “grownup” table. We were beside our selves, what with the pretty china and crystal glasses we’d get to eat and drink from, likely with our pinkies up.

It started off all well and good. But without getting into all the details, we were not invited back the next year.

At 26, we sometimes still eat at the children’s table.
 

It’s more fun there anyways.

Mama’s fall classics make their first appearance of the holiday season on Thanksgiving, another reason for it being my favorite. Things like her fresh cranberry relish, corn casserole, cranberry upside down cake, and her squash pudding.

The general atmosphere is one of love and thanks and lovely smells from the oven permeate the cozy air.

I took my mama’s squash pudding and put a slight spin on it. Instead of regular old oats, I switched them out for some Bob’s Mill gluten free ones. And in the spirit of avoiding refined sugars, I traded brown sugar for coconut palm sugar and white sugar for honey. 

Happy Thanksgiving!!!


Squash Pudding

Ingredients:

Topping:

½ cup crushed pecans

½ cup gluten free oats

⅓ cup coconut palm sugar

pinch of salt

4 tablespoons grassfed butter, melted

Pudding:

1 large butternut squash, cooked, scooped out of skin, and mashed (approx. 2 cups of mashed squash)

½ cup of coconut palm sugar

¼ cup of honey

¼ teaspoon ground ginger

1 tablespoon vanilla extract

¼ cup of grassfed heavy cream or whole milk

4 tablespoons grassfed butter, melted

2 eggs, beaten

Directions:

Heat oven to 350 degrees.

In a small bowl, combine the pecans, gluten free oats, coconut palm sugar and pinch of salt. (Do not add melted butter yet! ) Set topping aside.

In the same large ovenproof casserole dish you will be using to bake the pudding in, make sure your squash is thoroughly mashed and no large chunks remain. Add the sugars, ginger, vanilla, cream, butter, and eggs to the squash and whisk to combine well.

Spread the topping evenly across the top of the pudding. Lastly, pour remaining melted butter evenly over topping mix, so that most of the topping has absorbed the butter.

Bake in the oven for approximately 40-50 minutes or until the topping is a nice crisp golden brown.

Baked Peaches

I've been posting desserts that just take a buncha time. Like this has to chill for like 8 years in the fridge and don't worry, straining all the seeds out of this will take no time at all. No big deal. It's worth ittttt, I say. Blah blah blah. ((Wait listen….totally worth it --- both of them))

I’m just trying to make a point for today’s post. These peaches are the easiest to throw together and you need to make them right now before peaches are gone FOREVER.

You'll soon learn I don't lack for any exaggeration or excitement.

At first I wasn’t totally sold on them, I’m gonna assume because it was like 10 in the morning and it was already sweltering hot out and eating hot fruit first thing in the AM was just not my cup of tea at that moment. It was so hot in my kitchen that my cream wouldn’t even whip. Hence the barely whipped cream in the photos, but I assure you that was not the problem. I’ve been known to just pour cream onto berries just straight from the bottle.

What?

You don’t do that? You ain’t even lived.

Anyways. The point here is. Later on, after dinner, I ate one cold from the fridge (with just straight cream drizzled on top.) And if that wasn’t the most tasty, refreshing, lovely bit of dessert.

So really, these work warm from the oven or cold from the crisper. Will last in a fridge a day or two before topping starts to get soggy, but they probably won’t be there that long, if you know what I’m sayin’.


Baked Peaches

adapted slightly from this recipe over at smitten kitchen

Ingredients:

4 ripe peaches, halved and pitted

½ cup almond flour

⅓ cup coconut palm sugar

a pinch of salt

a dash of cinnamon

3 tablespoons butter

Whipped cream for garnish, optional

Directions:

Heat oven to 350 degrees

Mix almond flour, coconut palm sugar, salt, and cinnamon together in a small bowl. Incorporate butter into the mixture with hands until it’s evenly distributed.

Divide mixture equally among peaches, filling each of the peach’s centers and lightly pressing the mixture down to cover the peaches’ surface..

Bake for about an hour or until topping is golden brown and crisped, and peach is soft and tender.

Vegan or strict Paleo option -- I bet you could switch out that butter for coconut oil without issue.

Can serve warm or cold.

Serves 8

Nectarine Tart with Hazelnut Crust

Down with the simple recipes I’ve been posting all week! And hear, hear to something a bit more complicated! Check out that ingredient list! Finally more than 5 items needed! Are you with me?!

Honestly this isn’t that complicated at all. But it does look fancy though, huh?

Most of the time it takes is hands off. Refrigeration and cooling time are what take this recipe up a notch, timewise. But that’s what weekends are for, amirite?

I’m sure this would also work with any fruit you have on hand. The custard is very neutral tasting so any summer fruit spread out over top would be both tasty and pretty looking. But that’s not to say the filling isn’t exciting. Just versatile.

I’m also pretty sure for the nut crust any variety of ground nut could work, but don’t hold me to that.

This could also easily become vegan if the honey in the filling is switched out for maple syrup or other sweetener and the butter in the crust is switched out for coconut oil.


Nectarine Tart with Hazelnut Crust

Ingredients:

Filling

1 can cold full fat coconut milk

¼ cup chia seeds

zest and juice of 1 lemon

1 teaspoon vanilla

3 tablespoons honey

1 tablespoon tapioca starch

Crust

2 cups ground lightly toasted hazelnuts

2 tablespoons maple syrup

dash of cinnamon

3 tablespoons butter

Topping

3 nectarines, halved, pitted, and sliced thinly.

2 to 3 tablespoons of peach preserves, warmed (or whatever you have around - it probably wouldn’t matter much. I used a strawberry-peach jam)

Directions:

In a bowl combine the coconut milk, chia seeds, zest, juice, vanilla, honey and tapioca starch. Whisk well to incorporate and then cover with plastic wrap. Refrigerate for at least 3 hours and up to overnight.

Heat oven to 350 degrees.

In a bowl combine the ground hazelnuts, the maple syrup and the cinnamon. Using your hands get the butter well incorporated into the nut mixture.

Pour nut and butter mixture into a 10-inch tart pan with a removable bottom. Press the mixture into the pan to cover the bottom and sides evenly.

Bake for about 20 minutes or until sides the sides become a gorgeous golden brown. If at any point in the baking you see part of the side begin to slump down just press it back into place with the back of a spoon.

Cool crust completely.

Once your filling has properly chilled and thickened (you should be able to run your finger or a spoon through the filling and not have it fall directly back in place) you can fill the cooled crust, spreading it evenly throughout.

Lay the nectarine slices one by one next to each other, overlapping them slightly along the edge of the crust. When that layer is finished, overlap slices in the remaining space in the center of the tart but layer the slices going in the opposite direction of the outside layer.

Take your warmed preserves and using a pastry brush, lightly glaze the nectarine slices.

Cover and chill the tart for another hour before serving.

Tart will keep for about a day in the fridge before the crust starts to get a bit soggy. Still delish.

Yield: 1 ten-inch tart

Blackberry Sauce with Olive Oil Yogurt Cake

I was aiming to post this before a weekend since it’s a dessert and baked things sometimes take a bit more time to produce but I wanted to get this up here before blackberries are but a distant memory of the summer.

The cake itself is super quick and easy. The sauce takes a bit more hands on time but it’s worth every second, at least I think so. Again, this is one of those summer standbys. We have huge blackberry bushes lining the entire length of my mother’s giant garden in Connecticut.

So I grew up eating this sauce all of August on top of Eggo waffles and on ice cream and on a simple yellow round cake that is similar to the cake I made here.

This cake though is gluten-free. It also utilizes yogurt, which for awhile there I was drowning in after having worked on a shoot for a certain big Greek yogurt company. Yay for perks of working on the culinary team! I made out like a damn bandit.

With the sauce I also decided to see if I could use something less refined like maple syrup instead of regular sugar and it worked like a charm. Careful using a wooden spoon with this, it will get stained a lovely shade of magenta.

stainedspoon.jpg

I think it’s an improvement really.


Blackberry Sauce

Ingredients:

1 ½ pints blackberries

¼ cup maple syrup (you may need to add more depending on the sweetness of your berries)

squeeze of half a lemon

Directions:

Throw your blackberries, maple syrup, and lemon juice into a small saucepan on a low to medium heat. Stirring occasionally and keeping at a low simmer. It will take the berries about 40 minutes to break down and for the sauce to be the right consistency. It will seem juicier than you think it should. But wait there’s more to come.

After 40 minutes, take your cooked berries off the heat. Gather a medium bowl, a small-medium fine mesh strainer and a spoon.

Place the strainer over the bowl and pour just a bit of the sauce into the strainer. Using the back of the spoon begin to press on the remaining chunky pulp getting as much solid berry as you can through the strainer. You should be left with mainly seeds once you’ve gotten as much as you can out of the pulp. Dump the seeds and start again with another pour of cooked berries. Continue in small batches until your saucepan is empty and your bowl is now full of strained berry puree.

Use this sauce to pour over the below cake, or other cake of your choice. Or ice cream. Or waffles. Or yogurt. Or anything…….should last about 2 weeks in the fridge.

Yield: approximately 2 cups

Olive Oil Yogurt Cake

adapted lightly from this cake from Canelle et Vanille

Yield: 1 nine inch round cake

Ingredients:

small amount of butter for greasing/flouring pan

3 eggs

1 cup raw sugar

1 cup full fat Greek yogurt

1/2 cup olive oil

Zest of 1 lemon

1 cup brown rice flour (mine was sprouted and organic), plus a bit extra to flour pan.

1/2 cup millet flour

2 tablespoons tapioca starch

1 tablespoon baking powder

1/2 teaspoon salt

Directions:

Heat oven to 350 degrees

Line a round 9-inch cake pan with parchment paper. Then butter and flour the sides of the pan.

Set aside.

In a large bowl, whisk together the eggs, sugar, yogurt, olive oil and lemon zest.

Once mixed, add in the brown rice flour, millet flour, tapioca starch, baking powder and salt. Whisk again to thoroughly incorporate.

Pour into the cake pan and spread it out evenly.

Bake cake for 30 to 40 minutes or until it’s edges have turned a lovely golden brown and a cake tester comes out clean.

Let cake cool in pan and then run a knife around the edges and flip onto a plate. Remove the parchment paper from the bottom of the cake then take your serving plate or platter and flip cake again so the top is now the top once more.

Serve slices with blackberry sauce drizzled on top and I mean it’s not like ice cream on the side would be out of place either.

Roasted Peach Strawberry Chunk Popsicles

14648978708_434e6ab681_c.jpg

Remember those cute bitty strawberries I told y’all about last week? The suspicious ones? Welp, I learned more about them this past farmer’s market visit. They’re called tristar strawberries and they have a much more flexible growing season. So my little suspicious strawbs, are definitely local, totally seasonal, and um, er, wut...oh the organic front? Yea….the jury’s still out. I had already bought them with my eyes before my wallet made it out of my bag and I was afraid to know the answer. So I still don’t know the answer, but the strawberries are little nuggets of summer heaven so I’m surely okay living in denial about them.

I ended up mixing some of them up into something "cool" with the other stars of summer, some sweet local peaches.

14648951069_c589d835a4_c.jpg

Perfect combo.


Roasted Peach & Strawberry Chunk Popsicles

Ingredients:

3 ripe peaches, quartered and peeled

1 teaspoon coconut sugar (or other sweetener)

1 cup almond milk (or any other milk - dairy or non)

1 teaspoon vanilla

1 tablespoon honey

½ cup chopped strawberries (tossed in a touch of honey if desired)

Directions:

Place your quartered peaches on your roasting pan and sprinkle sugar on top and toss in pan to cover evenly.

Throw into an oven at 350 degrees for about 30mins until soft and caramelized.

Remove and let cool.

Once peaches have cooled a bit, place in blender along with almond milk, vanilla, and honey. Blitz until smooth and combined.  

Stir strawberries into the peach-milk base and pour into the popsicle molds.

Freeze until hard, about 5 hours.

Run mold under warm water to loosen.

Makes 8 three ounce popsicles.