Savory Greek Yogurt Salad

Sometimes I wonder when I’m gonna get my actual act together and cook dinner on a weeknight like a real live adult. I start off the week with the best of intentions. There’s always meat in the freezer that could be thawed. There’s typically no shortage of vegetables in the crisper due to my weekly market run. I don’t have single girl syndrome to fall back on, I’m pretty sure my boyfriend of many years wouldn’t complain if my cooking-for-two was together enough to extend past Saturday and Sunday nights.

But then I get home at 7pm and I’m all like, “yea this single fried egg with hot sauce is a perfectly acceptable meal.” This brings me to the savory greek yogurt salad that has become a staple in my weeknight meal rotation. I’m not going to pretend that other grownups would consider this a full fledged main entree, but for me on a Tuesday night, it does the trick. 

It’s tangy and savory and has protein, there’s salty feta and an herby cucumber tomato salad and lately I’ve taken to adding lots of toasty sesame seeds and for the tiniest sweet touch, some golden raisins. I feel like it’s a lot more well rounded than my standard egg for dinner. I will admit it’s a very summery salad --- cool, crisp and full of summer fare. I’ve had this salad in my back pocket for awhile now, I kept waiting for the other shoe to drop and for all the tomatoes to disappear all at once! But since the market had no shortage this past weekend, I have no problem telling to you make this immediately, before it’s too late!


Savory Greek Yogurt Salad

Ingredients:

½ cup chopped tomatoes

½ cup chopped cucumber

1 teaspoon dill, finely minced

1 teaspoon parsley, finely minced

1 teaspoon mint, finely minced

1 teaspoon shallot, finely minced

juice of ½ lemon

tablespoon or so of olive oil

salt and pepper to taste

scant ¼ cup crumbled feta

1 cup greek yogurt

Optional, not pictured:

sprinkling of sesame seeds (or sunflower or pepitas...or all)

golden raisins

Directions:

In a bowl, combine tomatoes, cucumbers, herbs, shallot, lemon juice, olive oil, salt and pepper.

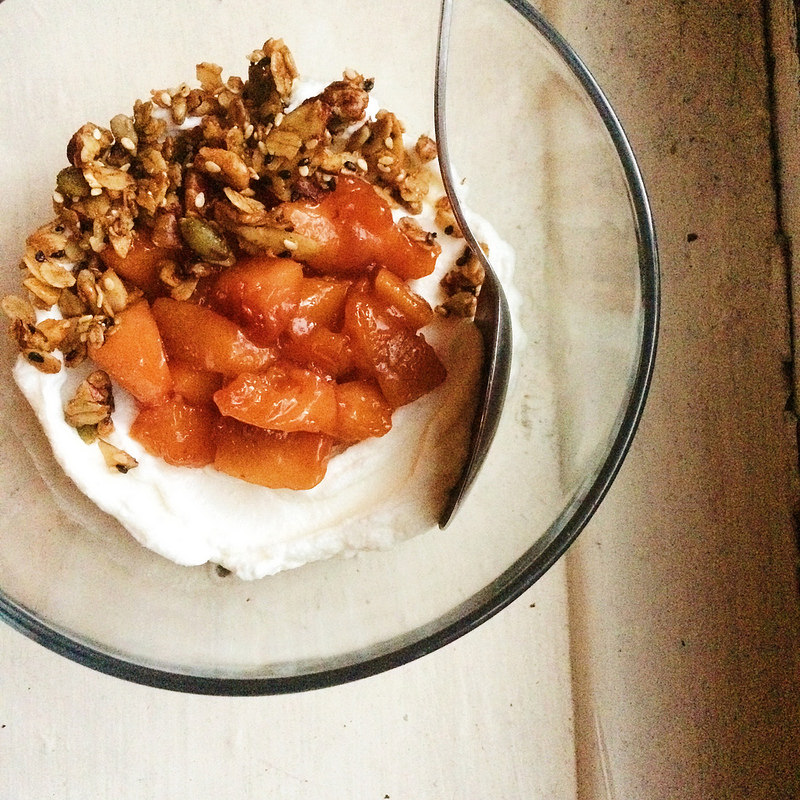
Put yogurt into serving bowl, spoon salad over top, dress with a touch more olive oil and fresh ground pepper, feta, and any other optional toppings if desired.

Serves 1

Gluten-Free Blueberry Scones

As I sit here in a cafe's sidewalk seating section with the warm sun beaming at my back, birds happily chirping, people walking along in shorts and skirts, and my iced coffee dripping with condensation, I can’t help but ignore the fact that apparently it’s the first day of fall. I’m sorry, what?

Per usual the season has flown by too quickly. I spent my last few weeks of summer completely wrapped up in my amazing new job (filed directly under a-great-problem-to-have) and I let this space wander. Now all of a sudden it’s fall and I’ve got a pile of summer recipes that are just too summery to post.

However, this year more than ever I’ve realized that summer “ain’t over ‘til it’s over” (R.I.P Yogi <3) and that means I’ve been bringing home blueberries by the quartful  from the farmers' market and will continue to do so until I can’t anymore. That also translates to --- I have too many blueberries in my fridge to be useful right now. But it also means, I have absolutely ZERO qualms telling you to make these blueberry scones right this second while blueberries are still in their prime.

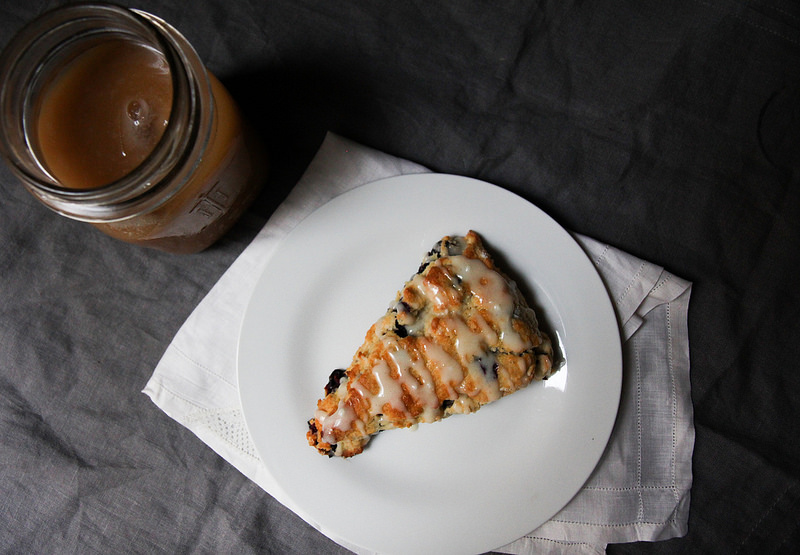
These scones are perfectly moist and crumbly at the same time a.k.a. perfect scone texture. They’re bursting with berries and are gluten free, but full of flavor. If I had turbinado sugar on hand, I would have sprinkled that on top for a crisp, shattering top, but instead I lightly drizzled them with a glaze that also did the job. Either way, you will get a perfect scone. Along with the perfect way to savor the very last drops of summer.

At the very least, you can take comfort in the fact it’s no longer too hot to turn on the oven, so you really have no excuse.


Blueberry Scones

adapted from this Smitten Kitchen recipe and this Food52 recipe

Ingredients:

1 cup white rice flour

1 cup brown rice flour

1 tablespoon baking powder

¾ teaspoon salt

1 cup buttermilk, cold

3 tablespoons maple syrup

1 egg

1 teaspoon vanilla

6 tablespoons very cold unsalted butter, cut into small cubes

1 cup blueberries

1 egg beaten or few tablespoons heavy cream for washing the tops of the scones

Optional topping:

Glaze

2 tablespoons of heavy cream

¼ cup organic powdered sugar

or

2 tablespoons turbinado sugar for sprinkling

Directions:

Heat oven to 425 degrees.

Line a large sheet pan with parchment paper or a silicon mat.

In a large bowl, mix together the flour, baking powder, and salt.

In another large vessel mix together buttermilk, maple syrup, egg, and vanilla.

Next cut the cold butter into the flour mixture and using your fingers mush the butter into the flour. The mixture should become like wet sand. At most the butter should be about the size of peas. Quickly add the blueberries to this mixture and gently toss until they are evenly distributed.

Add the wet ingredients to the dry and with a fork gently fold the wet into the dry. Mix until the batter just comes together.

Dump the dough onto a well floured surface and form gently into a disk and pat down until it’s about one inch thick.

Using a large knife or bench scraper cut the disk into eight equal sized wedges.

Transfer wedges to the prepared sheet pan and space at least 1 inch apart. Brush the tops with beaten egg or heavy cream.

Bake for about 20 to 25 minutes or until the tops are a golden brown.

For the optional glaze: whisk cream and powdered sugar together until a smooth glaze comes together. Let the scones cool just slightly before drizzling glaze over the tops. Or before baking, sprinkle tops with raw turbinado sugar.

Yield: 8 scones

Pickled Peaches

Almost a year ago my boyfriend and I were visiting the fair city of Boston and true to character, the first restaurant on our to do list was known mainly for its burger. (jmCurley, if you’re interested in that kinda thing)

First, we ordered some of the tastiest whiskey cocktails we’ve ever had. Then, in lieu of a typical bread basket, what arrived to the table on the house was bacon grease popcorn. We could have stopped right there and I would have been satisfied with the entire excursion. But then in logical “we’re on vacation” YOLO fashion we went on to order an appetizer.

What showed up to our table went beyond all of my expectations. A luscious ball of burrata, surrounded by teensy toasts, prosciutto, pickled peaches, and microgreens all drizzled with a balsamic reduction. It began my head over heels love affair with burrata and introduced me to the pickling of peaches which completely blew my little mind. The burger, mind you, was also completely amazing and lived up to its reputation. But what I went on talking, thinking, and dreaming about for the next six months was that appetizer.

It became an immediate goal to figure out the secret of the pickled peaches. I imagined it might be hard, possibly involve a pressure canner or other unwieldy things that I may or may not have room for in my tiny NYC apartment or time for in my packed NYC schedule. So last year, peach season slipped right on by before I could attempt my hand at adding vinegar to sweet summer peaches and creating pickling magic.

The moment peach season arrived this summer, there was this little voice in my head poking me, tapping me on the shoulder, whispering into my ear as I stood over the peach bin at the farmers’ market. “Hey! Hey you! Don’t forget to pickle some peaches this summer!”

Turns out that it might be one the easiest things I’ve undertaken in the name of this blog. Completely easy and totally worth it. Now I just have to go get myself a big ole’ ball of burrata and re-live that appetizer from heaven experience.


Pickled Peaches

adapted from this Kinfolk recipe

Ingredients:

¾ cup white vinegar

½ cup apple cider vinegar

1 cup water

1/2 cup of maple syrup or brown sugar

3 cinnamon sticks

1 teaspoon whole black peppercorns

1 teaspoon whole cloves

1 whole vanilla bean or 1 teaspoon vanilla extract

pinch of salt

4 ripe but firm peaches, pitted, peeled and cut into eighths

Directions:

In a small saucepan, heat white vinegar, cider vinegar, water, maple syrup, cinnamon sticks, whole peppercorns, whole cloves, vanilla bean, and salt over a medium heat. Stir to combine. Bring mixture to a boil and then let simmer for about 10 minutes.

Meanwhile put prepared peaches into a heat safe container. When pickling liquid is ready, pour over the prepared peaches to cover. Let peaches and liquid sit until room temperature. Then cover and keep refrigerated.

Yield: 1 quart of pickled peaches. Will keep in refrigerator for approximately one month.

Sour Cherry Oat Crumble Muffins

I spent the first three weeks of sour cherry season walking right on by them. Part of it was the $12 a box price tag. The other part was that I had no clue what I would do with them, so I couldn’t justify the $12 a box price tag.

muffinslast.jpg

But I finally succumbed and doled out a hefty portion of my market budget for a quart or two. Coming out on the other side of it, though, I can say it was worth it. Also as the season has lingered on the price did come down a bit.

After the cherries themselves convinced me to make some compote out of them, I tasted it and was like I’m eating exactly what I love about cherry pie. Okay, I get it. I get what the big deal is. Then it was only a matter of figuring out what to put it in that wasn’t cherry pie. Because, as I’ve already embarrassingly admitted, I don’t really like pie. 

I know...I know.

muffins3.jpg
muffins4.jpg

So first, these popsicles happened. But I was left with a good amount of compote still to use. Which was not really a problem. I could have left well enough alone and just had a half pint jar of it in my fridge for a few weeks to come -- to swipe on toast or swirl into yogurt or top ice cream with. What I did though, was swirl it into some muffin batter and then covered that with a crumble, because, it just made sense at the time.

Barely sweet gluten free batter, swirled with puckery sour cherry compote, topped with buttery sweet oat crumble was definitely a good decision. Let me know if you think so too...

muffins5.jpg
muffinsfinal.jpg

Sour Cherry Oat Muffins

Adapted from this Canelle et Vanille recipe

Ingredients:

Oat Crumble:

1 cup old fashioned oats (gluten free if needed)

¼ cup coconut palm sugar (or brown sugar)

¼ cup coconut flour

pinch of salt

3 tablespoons butter

Muffins:

3 eggs

½ cup raw sugar

1 cup full fat greek or other yogurt

½ cup melted butter

1 teaspoon almond extract

1 cup brown rice flour

½ cup millet flour

2 tablespoons tapioca starch

1 tablespoon baking powder

½ teaspoon salt

1 cup cherry compote (recipe here)

Directions:

Heat oven to 350 degrees.

In a medium sized bowl combine oats, coconut palm sugar, coconut flour, and salt. Cut the cold butter into the crumble mix and mush together with your fingers or a pastry cutter until butter is mixed into the oat mixture well. It should clump if you press it together in your hands. Set aside.

In a large bowl, whisk together eggs, sugar, yogurt, melted butter,  and extract to combine well. Add flours, tapioca starch, baking powder, and salt and whisk well to combine.

Line a muffin tin with cupcake liners. Fill each wrapper about three quarters of the way with batter. Next dollop about 1 tablespoon of cherry compote onto the batter of each muffin. Take a tooth pick or other type of skewer and artfully drag the compote throughout each muffin to create swirls.

Lastly sprinkle a little bit of oat crumble on top of each muffin.

Bake in oven for about 20 to 25 minutes until they are golden brown and a cake tester comes out clean.

Note: You might have oat crumble leftover if you don’t use it all on top of the muffins. Simply line a sheet pan with some parchment paper and spread the crumble out on it. Bake it in a 350 degree oven for about 10 to 15 minutes or until golden and toasty. Once cooled, place in an airtight container and use on yogurt or ice cream like you would a granola.

Makes 1 dozen muffins.

Sour Cherry Almond Yogurt Popsicles

I want to love pie. I really, truly, desperately do want to love pie.

I appreciate pie. I appreciate pie in the sense that I know how much blood, sweat, and tears usually go into making pie. That, and they are just so pretty. I love the aesthetics of pie. The crinkled edges, the handiwork of the lattice, the snappy looking sugary top. Give me a piece of pie and I will fawn over it like it just won the county prize at the fair.

Expect me to eat that prize winning slice and I will proceed to scoop out and only eat what’s inside the pie. So what I really love is the fruit. That warm, syrupy, drippy fruit.

So when faced with a quart or two of perfectly perfect bright red sour cherries and not even one inkling need to make pie, what’s a girl to do? Of course I only bought the cherries because what kind of seasonal blogger would I be if I didn’t. I had a stare down with my quart of cherries and eventually they convinced me to just throw them into a saucepan with some sugar and almond extract, because when in doubt, make compote.

Consequently I ended up with a bunch of warm, syrupy, drippy fruit which is exactly what I like. Those saucy cherries then talked me into swirling them into a couple things, including these yogurt popsicles, but none of them pie.


Sour Cherry Almond Yogurt Popsicles

Ingredients:

Cherry compote:

1 quart sour cherries (approximately 2 pounds), pitted

⅓ cup raw sugar or other sweetener

juice of half a lemon

1 teaspoon almond extract

1 teaspoon tapioca starch (or cornstarch)

Yogurt Base:

1 cup plain greek yogurt

½ cup whole milk

2 tablespoons honey

1 teaspoon almond extract

Almond crust (optional):

½ cup roughly chopped sliced lightly toasted almonds

Directions:

In a 2-quart saucepan over medium to low heat, bring cherries, raw sugar, and lemon juice to a simmer. Cook for about 25 minutes until cherries have broken down and released their juices. When they’ve reached the correct consistency, stir in the almond extract. Lastly scoop about a ¼ cup of juice from pot into a small dish. Whisk the starch into this juice and once combined quickly add back to the cherry pot. Stir well to incorporate. Once the juice has thickened into a syrup, remove from heat and let cool.

Once cooled, blitz briefly in a food processor or blender until mostly but not fully pureed. A few chunks of cherry are welcomed.

While the compote is cooling, get the yogurt base ready. In a large bowl, whisk yogurt, milk, honey and almond extract until smooth. Keep chilled until compote is cooled.

To assemble pops: pour about an inch of yogurt base into each of six pop molds. Next layer in one heaping tablespoon of cherry compote into each. Finish each with another layer of yogurt base, leaving about ¼ inch at the top of each mold to accommodate for expansion. Next take a popsicle stick and artfully drag the cherry compote through the yogurt mix of each popsicle mold. You should be able to create some pretty swirl action for each pop.

Get your popsicle mold ready for the freezer by placing on covers, adding popsicle sticks, etc.
 

Freeze for 4 to 5 hours or until fully frozen. Run under warm water to loosen.

If desired, let the pops begin to melt just slightly, and then roll in chopped almond slices to coat. Enjoy right away or return to freezer to be enjoyed at a later time.

Note: You will have compote leftover. I promise that having left over cherry compote is not a problem. I’ve been swirling it into plain yogurt for a sweet snack. Swiped on some toast, waffles, or pancakes would be great. I have no doubt that spooning it over vanilla ice cream would be divine. This cake would welcome the addition.

Makes six 8-ounce popsicles.

What I Really Eat: Roasted Rhubarb & Strawberries

"What I really eat" are my Iron Chef meals. My pantry meals. Shit, my fridge is empty meals. The things that come out of necessity and lack of time. The ingredient list will usually be small and the execution usually simple. Something that is less of a recipe and more of a guideline. If something exceptionally awesome comes out of my Sunday night scramble, it will get posted as a “What I Really Eat” and probably be accompanied with a not-my-best photo.

I can’t be the only one who found a hidden half bag of rhubarb in my crisper. I can’t be the only one who bought way too many strawberries and now have the most melty batch ever hanging out in the fridge. I can’t be the only one who thought that even though it didn’t work the first two times, that maybe, maybe this time the recipe would work.

Am I the only one? It’s okay you can tell me.

I had lofty visions. There would be whey protein! And chia seeds! And almond milk! And most importantly the essence of summer in concentrate --- drippy chunks of caramelized, roasted strawberries and rhubarb. Then I would bask in that post yoga glow, drinking summer and recovery in a glass. I tried really, really hard to make the summeriest post workout shake I could. I now have the endless amount of essentially tasteless smoothie servings stacked up in my freezer to prove how hard I tried. Unfortunately for me and my next dozen yoga sessions, it just did not work. Short of using the entire batch of roasted fruit for just one serving, the sweet, puckery strawberry-rhubarb combo just did not translate through the rest of the shake. I guess I thought the flavors would be a bit more shouty. Also, I will admit that if I was trying for shakes not of the protein variety it probably would have worked much better.

On my last attempt I was a bit defeated as I packed up yet another batch bound for the freezer. But since I had resisted in dumping the entire batch of fruit into the blender, the remainder of the day I found myself scooping up spoonfuls of the roasted fruit straight to my mouth. If anything was worth sharing other than my tale of failure, it’s this dead simple recipe for roasted strawberries and rhubarb.

Recipe is obviously a strong word. Regardless, your morning yogurt or after dinner ice cream will be the better for it. I’m feeling wistful that I didn’t think to swirl it into a baked good. It just didn’t last that long.


Roasted Rhubarb & Strawberries

Ingredients:

2 cups rhubarb diced into 1-inch pieces

2 cups strawberries halved

2 to 3 tablespoons turbinado sugar or other sweetener (feel free to add more, I like it tart)

Directions:

Heat oven to 400 degrees.

Line a sheet pan with parchment paper. Spread fruit out across paper. Sprinkle with sweetener and then give it a good toss to coat evenly.

Put in oven until juices have released and fruit is bubbly and caramelized, about 45 minutes. Check at least once, and give it a toss if desired.

Makes approximately 2 cups of roasted fruit.

What I Really Eat: Migas Style Breakfast Tacos

"What I really eat" are my Iron Chef meals. My pantry meals. Shit, my fridge is empty meals. The things that come out of necessity and lack of time. The ingredient list will usually be small and the execution usually simple. Something that is less of a recipe and more of a guideline. If something exceptionally awesome comes out of my Sunday night scramble, it will get posted as a “What I Really Eat” and probably be accompanied with a not-my-best photo.

Having not encountered much Tex-Mex growing up, I didn’t learn the genius of migas until I was watching the special features section for the movie Sin City. I was a bonafide film nerd growing up (I even went to film school!) so it was normal for me to pour over the special features of any movie I came across. Here is where Robert Rodriguez solidified himself as both a favorite director and a serious crush factor. He makes movies? He cooks? And eggs for dinner at that? Sold. I’m sold.

(I highly suggest watching his other cooking school videos. As he wisely says "not knowing how to cook is like not knowing how to f...just watch the videos.)

My love of migas has now totally and completely been cemented since I began visiting friends in Austin, Texas. One night while everyone else was drunkenly digging into some deliciously sloppy nachos, I was happily inhaling migas breakfast tacos at one in the morning.

These should work for all your come-home-a-bit-tipsy midnight snack needs, breakfast for dinner indulgences, and are just as appropriate for the time of day when eggs are usually consumed. They would make an awesome assemble-your-own brunch item. I’ve even packed them up for “not a sad desk lunch". Eaten cold from the fridge with my fingers? Guilty.

These of course would be much more simple without all the frying of various carb sources, but it’s the crunch of the tortillas that gets me every.single.time. More power to you if you make your own tortillas, recipe is in the video link. I’ve done it before and it is for sure worth it. When I’m just looking to stuff my face though, some organic sprouted corn tortillas I found at Whole Foods have been doing the trick just fine. If you do watch the video, I did adapt the recipe to essentially combine the two different tacos he makes. Believe you me, when tomatoes are in season again, those are going right on in.

I don’t believe in Cinco de Mayo, but I do believe in tacos. Here’s my contribution to the “holiday”.


Migas Style Breakfast Tacos

adapted from Robert Rodriguez’s 10 Minute Cooking School

Ingredients:

¼ cup olive oil for frying

2 smallish yukon gold potatoes, diced

2 corn tortillas, cut into ½ inch squares

2 tablespoons butter

1 onion, diced

1 jalapeno, ribs and seeds removed and minced

6 eggs

splash of heavy cream or whole milk

salt and pepper

6 additional corn tortillas for serving

sliced avocado

hot sauce to taste

Directions:

In a medium sized skillet heat up approximately a ¼ cup of olive oil over medium heat. Once the oil is hot enough add diced potatoes to oil. Fry up until golden brown on all sides and soft when pierced with a fork. Remove from oil and set on a paper towel lined plate to drain, sprinkle with salt to taste.

Add cut up tortillas to the same oil, watch these carefully they will brown up quickly. Fry until completely golden brown. Turn off heat and add to paper towel lined plate to drain. Sprinkle with salt to taste.

In a different skillet or the same with oil cleaned out, heat 1 tablespoon of butter over medium high heat. Once melted add onion and jalapeno to the pan. While the vegetables are cooking, beat the 6 eggs with the splash of heavy cream and salt and pepper until combined.

When onion and pepper are getting soft and starting to caramelize, crank up the heat to high and add the remaining tablespoon of butter. Swirl to coat pan. When butter is melted and starting to brown, add the eggs to the hot pan. Let eggs begin to set on the bottom and then quickly add the potatoes and fried tortillas to the eggs. Start to pull the eggs away from the sides of the pan as you would scrambled eggs. Continue to cook eggs until the desired consistency. Remove from heat and plate.

Here’s where you do you. To serve, if you want lightly warm a tortilla then scoop a bit of the eggs into it. Top with avocado and hot sauce to taste. Proceed to stuff face.

Serves 4 to 6

Winter Fruit Salad

It’s a shame that fruit salads pretty much go by the wayside the moment it gets colder than 60 degrees outside. I guess it’s just one of those lovely, light, refreshing type things that makes hot summer days that much more bearable. Summer is fruit salad’s time to shine.

However, some of my favorite fruits come into season once the mercury drops below 50 up here. I’ve always had an affinity for tart and puckering fruits and citrus. I was shocked to learn that the majority of people I’ve met in my adult life did not know what a grapefruit spoon was. I was even more floored and slightly disgusted by the people who did know what a grapefruit spoon was but admitted to sprinkling the fruit with sugar first. One might say it defeats the purpose?

After Thanksgiving sins, I really felt like a fresh clean slate and all the newly seasonal fruits were calling my name, this is how this salad was born. Lightly sweet, but at times tart, totally refreshing, and the pomegranate seeds give a nice crunch. The acid from the dressing and the grapefruit also soften the apple slices as the salad sits. I think that the salad looks really pretty with all the slices and segments, but to make for an easier spoonful, giving the apples and grapefruit a cut down in size might make things more bite friendly.

If you wanna be “that person” at the holiday party, by all means, this is perfect. It’s so darn pretty and it would be a nice break from the general heaviness of holiday party eats, if, of course, someone decides to take the chance. You know what I mean by “that” person, right? The person who brings fruit salad to what is essentially a calorie-carb free for all. Those events are usually a “give me all the cookies, cream sauce, and butter you have” type of situation. I can’t guarantee that this beautiful thing won’t be largely ignored among the other goodies on the dessert table. Call it a palate cleanser if you will. Regardless, it’s even better the next day, so it’s a great make ahead dish. Oh! And wouldn’t this be a nice combo in a winter sangria?  

allmixedup.jpg

I do plan on bringing this to a holiday shindig this weekend! So I will be that person (I’ll let ya know how it goes!) But by that person, I mean that I will also be bringing a cake that has nearly two sticks of butter and enough sugar in it to kill a small pony. It’s all about balance people.


Winter Fruit Salad

Ingredients:

1 teaspoon honey

2 tablespoons fresh lemon juice

4 clementines, peeled and segmented

1 grapefruit, peeled and segmented (Video on segmenting citrus! So helpful!)

1 apple, cored and thinly sliced

1 pomegranate’s worth seeds

In a small bowl whisk together lemon juice and honey.

Add all fruit to a large bowl and pour the lemon-honey dressing over the fruit. Gently mix to combine, careful not to break up the fragile grapefruit segments. Serve cold and if there is time, let it sit before serving to meld and get juicy!

**Note on this since I've made it a few more times since originally posting: there's no real need for the dressing. It does add a layer of flavor for sure, but let's just say you're out of lemons or don't have honey or are watching for added sweeteners -- just leave it out. The grapefruit provides a nice base layer of juice. Also I've been subbing in orange segments for the clementines and I haven't looked back. ---M