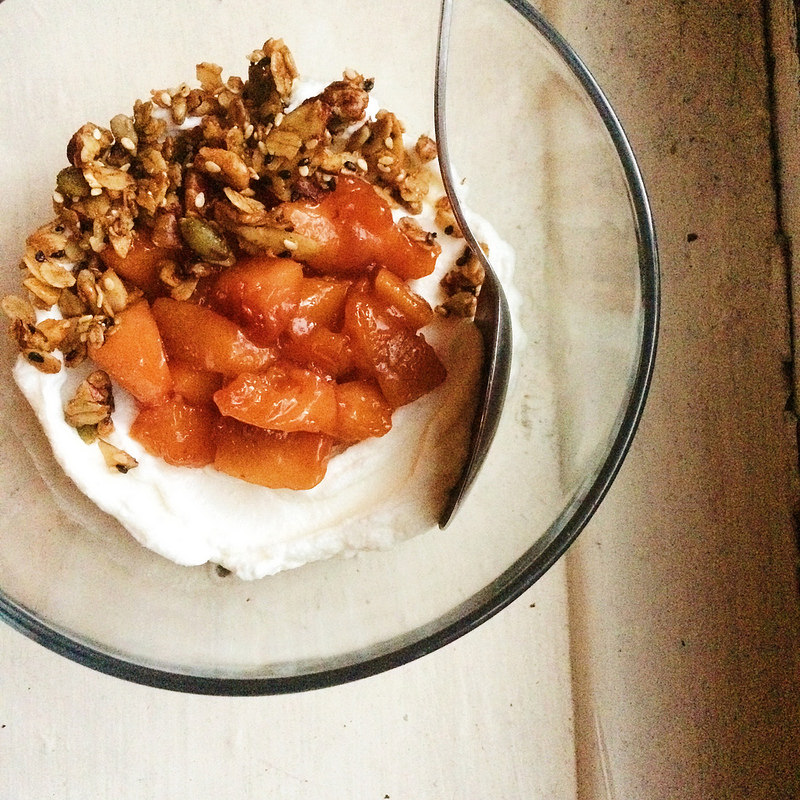
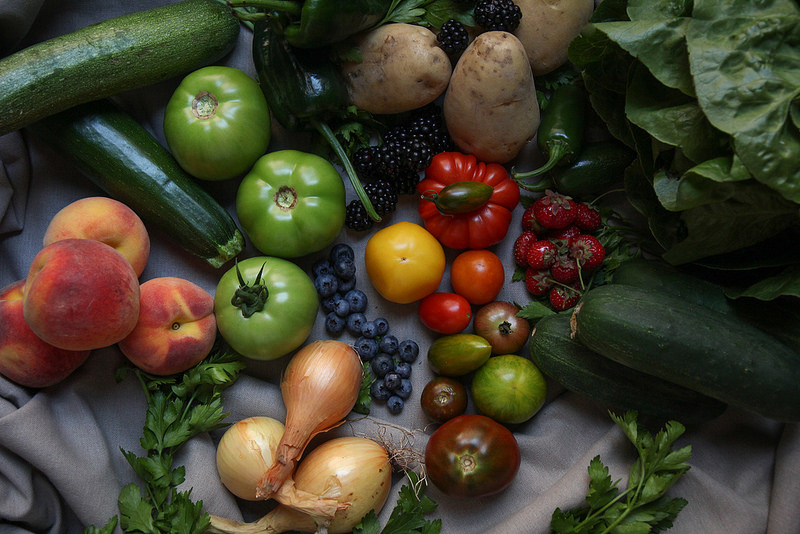
What I Really Eat: End of Summer Peach Compote

"What I really eat" are my Iron Chef meals. My pantry meals. Shit, my fridge is empty meals. The things that come out of necessity and lack of time. The ingredient list will usually be small and the execution usually simple. Something that is less of a recipe and more of a guideline. If something exceptionally awesome comes out of my Sunday night scramble, it will get posted as a “What I Really Eat” and probably be accompanied with a not-my-best photo.

It happens to the best of us. You get cocky. You take it for granted and you don’t realize that the last peach you ate, that last really great peach, was going to be the last great one of the season. If you had known, you probably would have savored it just a little bit more, made it last just a little bit longer. But alas, that is life.

I get it. You’re at the farmers’ market and you’re like: psh...it’s almost October? Whatever! Look at all these bins of peaches, they have to be good, right? WRONG. It’s now the time to play end of summer peach roulette. Could get a great one! Could get six really terrible ones.

As I bit into a farmers’ market peach the other night (one of half a dozen I had brazenly brought home), I came to the stark realization that summer might really be over, and therefore eating really great peaches along with it. My peach was mealy and chalky and tasteless. I swear I almost cried. Boyfriend looked over at me and said, “what’s wrong?”, as my shoulders fell and I probably looked like someone had just kicked the cat, and then I spit my bite of peach into the garbage with defeat.

There I was though, half a dozen deep in shitty end of summer peaches that nevertheless pained me to leave to the fruit flies. So I fell back on a mantra that has gotten me through many a questionable situation: When in doubt, make compote

Would cooking these mealy, lackluster things with a little bit of sugar and some lemon juice and maybe a cinnamon stick save them?

The answer was yes.


End of Summer Peach Compote

Ingredients:

5 to 6 peaches, pitted, peeled and roughly chopped

¼ cup raw sugar or other sweetener (or to taste)

juice of half a lemon

one whole cinnamon stick (optional)

Directions:

In a small saucepan over medium heat, bring all ingredients to a light boil, stirring as needed. Lower heat to a simmer and let compote cook down, stirring occasionally for about 30 minutes or until fruit has cooked to desired consistency. Remove cinnamon stick to serve.

Compote freezes well, if you, like me, have an obsession with saving some summer for later. I plan to swirl it into yogurt with homemade granola (via dash and bella) for the rest of the week. It would be at home on toast or ice cream or waffles or pancakes as well. Just sayin.

Makes about 1 ½  cups of peach compote.

What I Really Eat: Saucy Zucchini & Tomatoes

"What I really eat" are my Iron Chef meals. My pantry meals. Shit, my fridge is empty meals. The things that come out of necessity and lack of time. The ingredient list will usually be small and the execution usually simple. Something that is less of a recipe and more of a guideline. If something exceptionally awesome comes out of my Sunday night scramble, it will get posted as a “What I Really Eat” and probably be accompanied with a not-my-best photo.

A less inspired person might look in their fridge and on their counter and see but a single languishing green squash and some dying baby heirloom tomatoes. But me? I saw dinner.

Summer, at times, forces me to become a partaker of the clean out the fridge meal. And typically I emerge a champion on the other side, with a quick dinner and extras for the freezer to boot.

What started as a cross-my-fingers-hope-this-tastes-good endeavor became one of my favorite summer dinners to date. And my boyfriend deemed it one of the meals that defines my cooking style --- homey, comforting, saucy and made of out nothing. He stirred it into some freshly scrambled eggs as he said this. I opted to plop it into some brown rice, and because “treat yo’ self” --- melted a bit of shredded mozzarella on top.

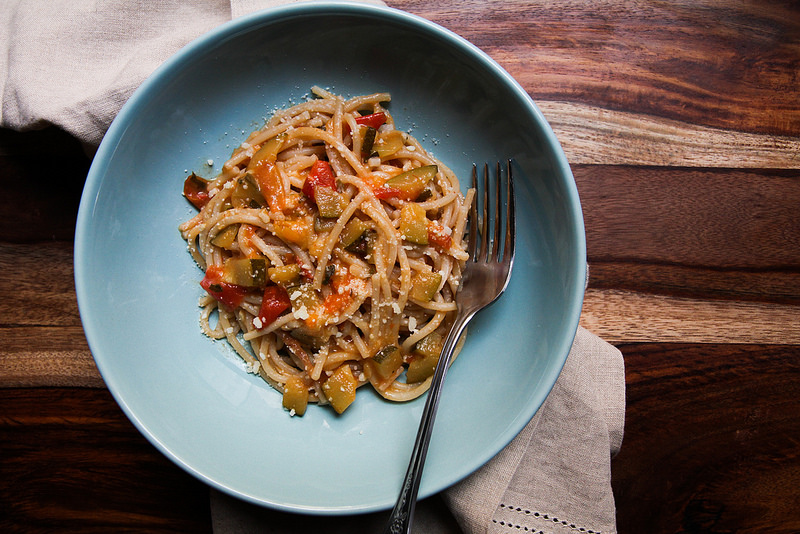
Over the next couple days, most found its way to the freezer for when I’m sad in January and I want a taste of summer. But just so I could show you what I did, I swirled some into brown rice pasta and then had a very good Saturday lunch.

saucyzukeandtom2.jpg

What I Really Eat: Saucy Zucchini & Tomatoes

Ingredients:

olive oil

2 cups zucchini, diced

2 cloves garlic, minced

2 cups tomatoes, diced

1 tablespoon tomato paste

1 cup chicken stock

1 teaspoon red pepper flakes

salt & pepper to taste

a touch of butter

¼ cup parmesan, shredded or grated

Directions:

Splash a bit of olive oil into the bottom of a medium sized pan over medium heat. Add diced zucchini to the pan and stir to coat in olive oil. Let the squash cook for about five minutes on its own, then make a well in the middle of the pan and add the garlic. Stir in garlic and let it become fragrant, about 30 seconds, then add the tomatoes. Stir to combine. Add the tomato paste to the pan and stir to coat all the vegetables. Keep stirring the tomato paste into the vegetables and let it begin to brown on the bottom of the pan for a minute or so. Then add the chicken stock and deglaze the pan, using your cooking utensil to scrape up the browned bits on the bottom of the pan. Add the red pepper flakes and season with salt and pepper. Let this mixture simmer until reduced by half and zucchini is nice and soft. Before turning off the heat, stir in a touch of butter and the parmesan cheese to combine. Taste and adjust seasoning if needed.

Stir into all the things.

Makes about 2 cups of saucy vegetables.

What I Really Eat: Roasted Rhubarb & Strawberries

"What I really eat" are my Iron Chef meals. My pantry meals. Shit, my fridge is empty meals. The things that come out of necessity and lack of time. The ingredient list will usually be small and the execution usually simple. Something that is less of a recipe and more of a guideline. If something exceptionally awesome comes out of my Sunday night scramble, it will get posted as a “What I Really Eat” and probably be accompanied with a not-my-best photo.

I can’t be the only one who found a hidden half bag of rhubarb in my crisper. I can’t be the only one who bought way too many strawberries and now have the most melty batch ever hanging out in the fridge. I can’t be the only one who thought that even though it didn’t work the first two times, that maybe, maybe this time the recipe would work.

Am I the only one? It’s okay you can tell me.

I had lofty visions. There would be whey protein! And chia seeds! And almond milk! And most importantly the essence of summer in concentrate --- drippy chunks of caramelized, roasted strawberries and rhubarb. Then I would bask in that post yoga glow, drinking summer and recovery in a glass. I tried really, really hard to make the summeriest post workout shake I could. I now have the endless amount of essentially tasteless smoothie servings stacked up in my freezer to prove how hard I tried. Unfortunately for me and my next dozen yoga sessions, it just did not work. Short of using the entire batch of roasted fruit for just one serving, the sweet, puckery strawberry-rhubarb combo just did not translate through the rest of the shake. I guess I thought the flavors would be a bit more shouty. Also, I will admit that if I was trying for shakes not of the protein variety it probably would have worked much better.

On my last attempt I was a bit defeated as I packed up yet another batch bound for the freezer. But since I had resisted in dumping the entire batch of fruit into the blender, the remainder of the day I found myself scooping up spoonfuls of the roasted fruit straight to my mouth. If anything was worth sharing other than my tale of failure, it’s this dead simple recipe for roasted strawberries and rhubarb.

Recipe is obviously a strong word. Regardless, your morning yogurt or after dinner ice cream will be the better for it. I’m feeling wistful that I didn’t think to swirl it into a baked good. It just didn’t last that long.


Roasted Rhubarb & Strawberries

Ingredients:

2 cups rhubarb diced into 1-inch pieces

2 cups strawberries halved

2 to 3 tablespoons turbinado sugar or other sweetener (feel free to add more, I like it tart)

Directions:

Heat oven to 400 degrees.

Line a sheet pan with parchment paper. Spread fruit out across paper. Sprinkle with sweetener and then give it a good toss to coat evenly.

Put in oven until juices have released and fruit is bubbly and caramelized, about 45 minutes. Check at least once, and give it a toss if desired.

Makes approximately 2 cups of roasted fruit.

What I Really Eat: Quick Chicken Francese

"What I really eat" are my Iron Chef meals. My pantry meals. Shit, my fridge is empty meals. The things that come out of necessity and lack of time. The ingredient list will usually be small and the execution usually simple. Something that is less of a recipe and more of a guideline. If something exceptionally awesome comes out of my Sunday night scramble, it will get posted as a “What I Really Eat” and probably be accompanied with a not-my-best photo.

Realistically I’ll realize about an hour before we should eat dinner that I’ve never taken the pack of chicken out of the freezer that I wanted to use. It’s then a mad dash to thaw chicken totally improperly so I can start cooking with it. At some point I acknowledge that whatever grand semi-plans I had for dinner need to be completely abandoned because I’ve wasted an hour of valuable time waiting for the chicken to not be a solid block of ice.

So we wait a little bit longer for the chicken to thaw. I don’t know if you know this, but like the watched pot never boils, the chicken never thaws. Then we slice each breast in half (it still being a little icy actually makes this easier.) Pound it thin with a meat mallet. Even though they’re still stupid cold, they’ll be so thin they will fry up quickly after a dredging of starch and egg. Deglaze the pan with chicken broth and lemon juice, reduce it to thicken and make it silky with butter. Pour over chicken. Shower with parsley. Done.

This is all practically 15 minutes after slicing the first breast open.

The takeaway: defrost your chicken in time for dinner. Or like me: ditch the original plan and make a dinner that only takes 20 minutes.


Quick Chicken Francese

Ingredients:

1 pound chicken cutlets, pounded thin

2 tablespoons tapioca starch or corn starch (can sub 1/4 cup flour to dredge instead, if desired)

1 egg

olive oil for sauteing

1 cup chicken broth

1 lemon, halved -- juice one half and thinly slice the other

1 tablespoon of butter

salt and pepper

2 tablespoons of chopped parsley

Directions:

Salt and pepper the cutlets. Dredge each in the tapioca starch and put aside on a plate. Beat the egg in a medium sized bowl.

Coat the bottom of a large saute pan with olive oil over medium heat. Once starting to smoke dredge the tapioca starched cutlets in the egg wash and place in the pan to brown. Let chicken cook on one side until golden brown. Flip and cook second side until browned and cooked through. Saute chicken in batches if needed. Set chicken aside.

Deglaze the pan with the chicken broth scraping up the brown bits on the bottom of the pan. Add the juice of half the lemon. Let this reduce down by half, about 5 minutes. In little pieces melt in the tablespoon of butter. Add the lemon slices to the sauce. Season with salt and pepper to taste.

Put chicken on a serving plate and then pour the pan sauce over. Sprinkle with chopped parsley.

Serves 4


What I Really Eat: Migas Style Breakfast Tacos

"What I really eat" are my Iron Chef meals. My pantry meals. Shit, my fridge is empty meals. The things that come out of necessity and lack of time. The ingredient list will usually be small and the execution usually simple. Something that is less of a recipe and more of a guideline. If something exceptionally awesome comes out of my Sunday night scramble, it will get posted as a “What I Really Eat” and probably be accompanied with a not-my-best photo.

Having not encountered much Tex-Mex growing up, I didn’t learn the genius of migas until I was watching the special features section for the movie Sin City. I was a bonafide film nerd growing up (I even went to film school!) so it was normal for me to pour over the special features of any movie I came across. Here is where Robert Rodriguez solidified himself as both a favorite director and a serious crush factor. He makes movies? He cooks? And eggs for dinner at that? Sold. I’m sold.

(I highly suggest watching his other cooking school videos. As he wisely says "not knowing how to cook is like not knowing how to f...just watch the videos.)

My love of migas has now totally and completely been cemented since I began visiting friends in Austin, Texas. One night while everyone else was drunkenly digging into some deliciously sloppy nachos, I was happily inhaling migas breakfast tacos at one in the morning.

These should work for all your come-home-a-bit-tipsy midnight snack needs, breakfast for dinner indulgences, and are just as appropriate for the time of day when eggs are usually consumed. They would make an awesome assemble-your-own brunch item. I’ve even packed them up for “not a sad desk lunch". Eaten cold from the fridge with my fingers? Guilty.

These of course would be much more simple without all the frying of various carb sources, but it’s the crunch of the tortillas that gets me every.single.time. More power to you if you make your own tortillas, recipe is in the video link. I’ve done it before and it is for sure worth it. When I’m just looking to stuff my face though, some organic sprouted corn tortillas I found at Whole Foods have been doing the trick just fine. If you do watch the video, I did adapt the recipe to essentially combine the two different tacos he makes. Believe you me, when tomatoes are in season again, those are going right on in.

I don’t believe in Cinco de Mayo, but I do believe in tacos. Here’s my contribution to the “holiday”.


Migas Style Breakfast Tacos

adapted from Robert Rodriguez’s 10 Minute Cooking School

Ingredients:

¼ cup olive oil for frying

2 smallish yukon gold potatoes, diced

2 corn tortillas, cut into ½ inch squares

2 tablespoons butter

1 onion, diced

1 jalapeno, ribs and seeds removed and minced

6 eggs

splash of heavy cream or whole milk

salt and pepper

6 additional corn tortillas for serving

sliced avocado

hot sauce to taste

Directions:

In a medium sized skillet heat up approximately a ¼ cup of olive oil over medium heat. Once the oil is hot enough add diced potatoes to oil. Fry up until golden brown on all sides and soft when pierced with a fork. Remove from oil and set on a paper towel lined plate to drain, sprinkle with salt to taste.

Add cut up tortillas to the same oil, watch these carefully they will brown up quickly. Fry until completely golden brown. Turn off heat and add to paper towel lined plate to drain. Sprinkle with salt to taste.

In a different skillet or the same with oil cleaned out, heat 1 tablespoon of butter over medium high heat. Once melted add onion and jalapeno to the pan. While the vegetables are cooking, beat the 6 eggs with the splash of heavy cream and salt and pepper until combined.

When onion and pepper are getting soft and starting to caramelize, crank up the heat to high and add the remaining tablespoon of butter. Swirl to coat pan. When butter is melted and starting to brown, add the eggs to the hot pan. Let eggs begin to set on the bottom and then quickly add the potatoes and fried tortillas to the eggs. Start to pull the eggs away from the sides of the pan as you would scrambled eggs. Continue to cook eggs until the desired consistency. Remove from heat and plate.

Here’s where you do you. To serve, if you want lightly warm a tortilla then scoop a bit of the eggs into it. Top with avocado and hot sauce to taste. Proceed to stuff face.

Serves 4 to 6

What I Really Eat: Kitchen Sink Salad Winter Edition

"What I really eat" are my "Iron Chef" meals. My pantry meals. Shit, my fridge is empty meals. The things that come out of necessity and lack of time. The ingredient list will usually be small and the execution usually simple. Something that is less of a recipe and more of a guideline. If something exceptionally awesome comes out of my Sunday night scramble, it will get posted as a “What I Really Eat” and probably be accompanied with a not-my-best photo.

Following a Saturday night of indulging in after-midnight pizza in a cathedral after seeing possibly the coolest broadway show ever (Hedwig). Then a hella busy Sunday of recipe testing, I was super in the mood for a salad dinner. My feeling towards salads are that they’re only boring if you let them be. For real, let your freak flag fly. Although, I will admit, my creativity can get the best of me when I hit up those city chopped salad bars. SO MANY CHOICES. I get overwhelmed and always end up with the most confusing salad. Womp, womp.

BUT, at home, with a more limited selection, that’s where I shine. A handful of this and pinch of that, toast these, throw that in, this can’t be a bad idea - in it goes! Even the boyfriend, who doesn’t really believe in salads as meals, could get behind this one. Or really any Kitchen Sink Salad I throw together. I’ve found that my winter salads have been the most inventive. In the summer, it’s so easy to rely on those perfect summer tomatoes, juicy cukes, crisp peppers but you end up with such a typical salad. But in the winter, you have to get creative with what’s available, I always end up with something outta this world.

Don’t feel limited by my ingredients below, GO NUTS, that’s what Kitchen Sink Salads are all about. Gather a base (lettuce, kale, cabbage, brussel sprouts), add whatever other veggies you have on hand (carrots, red onions), next up your add ins -- something spicy maybe like pepperoncinis (personal fave) or pickled jalapeños, something crunchy - sunflower seeds or pepitas, a funky cheese - feta, parm, pecorino or bleu, something sweet -- citrus segments or pomegranate seeds, and maybe some creamy avocado. Top it all off with a simple dressing, something punchy with a lot of acid. Just add protein for a full meal. Big bang boom, you’re done.


Kitchen Sink Salad

Ingredients:

1 head romaine lettuce, chopped in 1-inch pieces

½ bunch kale (I used curly purple kale), destemmed and torn into 1-inch pieces

1 carrot, shredded

3 pepperoncini, sliced

1 cara cara orange, segmented

1 avocado sliced

handful of sunflower seeds

handful of crumbled feta cheese

handful of pomegranate seeds

juice of half a lemon

good drizzle of olive oil

salt and pepper to taste

Directions:

Add all ingredients to a large bowl, ending with the squeeze of lemon, drizzle of olive oil and seasoning.

Toss to combine. Adjust seasoning as needed. Serve.

Eat the entire bowl with a side of cooked chicken breast while watching Six Feet Under (optional) a.k.a. serves 2 as a meal with added protein.

Serves 4 as a starter or side.

What I Really Eat: Cowboy Chicken

"What I really eat" are my Iron Chef meals. My pantry meals. Shit, my fridge is empty meals. The things that come out of necessity and lack of time. The ingredient list will usually be small and the execution usually simple. Something that is less of a recipe and more of a guideline. If something exceptionally awesome comes out of my Sunday night scramble, it will get posted as a “What I Really Eat” and probably be accompanied with a not-my-best photo.

This is really just roast chicken on top of potatoes and onions. Is this a tale as old as time? Probably. Am I teaching you new things? Probably not.

But this is what this series is all about. It’s not all brown butter and fancy frosting tips in the sizzle & sass kitchen. Sometimes you just gotta eat. And that sometimes is usually a Sunday night at 9pm after a day of burning frittatas, dropping coffee cakes on the floor, and then probably burning something else.

I call this cowboy chicken, because the general idea of it came from a roommate whose many wild woodsman ways reminded me vaguely of a cowboy. A cowboy, not of the southern variety, but of the midwestern -- the Montana type. His version used skin on, bone in chicken thighs with a pat of butter and a garlic clove tucked neatly underneath the skin of each. He placed the thighs on top of roughly chunked potatoes and onions and sent them into the oven to seduce each other into fatty mouthwatering bliss.

The result: crispy garlic laced chicken skin on top of juicy thigh meat, with softly cooked potatoes and caramelized onions coated lovingly in chicken fat beneath.

oh.my.god.

I fussed my version up a bit, unneedingly. I made a compound butter of parsley and garlic paste and smothered an entire bird with the stuff. I sliced my onions instead of chunking them as I do the potatoes.

The same carnal reaction happens in the oven though.The fat and juice from the bird drips onto the potatoes and onions as it roasts and just...oh….

This can be done with any part of the bird, though I highly suggest that it’s with skin on, bone in pieces of meat. Whole legs would be great. I’ve done it with rib in breasts.

The lovely part about this meal is that it is also a “set it and forget it” kinda dinner. You gotta let the chicken just do it’s thang, and that’s usually for the better part of an hour. But then here’s where you get inspired by the ever-genius Michael Ruhlman. See article: here.

I’ll just leave you with that to ponder.


Cowboy Chicken

Inspired by my good friend, Erik

Ingredients:

1 large onion, sliced

1 pound yukon gold potatoes, cut into 1 inch chunks

1 whole roasting chicken (or any other skin on, bone in chicken parts), rinsed and patted dry

3 tablespoons butter

2 cloves garlic

1 tablespoon fresh parsley, finely chopped

salt and pepper

Directions:

Heat oven to 400 degrees.

In a large baking dish or roasting pan layer the onions and potatoes evenly, season with salt and pepper. Place rinsed, dried chicken on top of the potatoes and onions.

Take two cloves of garlic and mince them as finely as possible. Sprinkle with a touch of kosher salt, and then drag the edge of the knife across the minced garlic and sort of flatten it out. Do this several times until the minced garlic has become a paste. (Here is a video displaying what I’m describing. Start at about 1:45)

Take your garlic paste, parsley and butter and mix together in a small bowl until evenly combined.

Spread this compound butter all over the chicken’s skin. Really massage it in there.

Season the bird liberally with salt and pepper, including the inside!

Throw into oven for about an hour or so. It should be uniformly golden and the juices should run clear when you make a small cut between the leg and the thigh.

Let chicken rest about 15 minutes before serving.

*** Two Quick Notes ***

1. The potatoes and onions will probably last a bit longer after the chicken has been picked over. I used mine as a base for eggs for days after. And almost had some left to swirl into some leftover spaghetti squash, but then I might've just eaten it with my fingers cold from the fridge.

2. Use that chicken carcass!!! Make bone broth/chicken stock. Place whatever is left over into a pot with some scraggly vegetables and some other aromatics and simmer away for a few hours. I got about 4 cups of bone broth out of the deal. Straight to the freezer it went to be used in any and everything that calls for stock! 

What I Really Eat: Roasted Sprouts & Squash

Here’s my dilemma: It’s 8:05 on a Sunday night. I’ve just spent all day testing recipes and the majority, failed. Or it was all desserts. This means...I still need to make dinner without much time to make things or maybe even the will to make anything else more complicated.

On days like this I usually fall back on my lazy girl dinner, which is meatloaf. And my other secret weapon is the fact that, on Sunday mornings -- we eat bacon.

After I finally got my act together and learned that making bacon in the oven is actually, the best, I now always end up with sheet pan of bacon drippings on Sundays. This means that without fail, whatever languishing vegetable is in the crisper drawer gets tossed in a coating of bacon fat, salt, pepper, and whatever else seems like a good idea and thrown into the oven for 40 minutes.

This dish is salty, spicy, and a bit sweet --- the sprouts get crispy, the squash rings chewy --- it is all the thingsI’d love to tell you I made a beautiful roasted chicken or perfectly seared steak to go with these.

But what I really did was #putaneggonit. (and it was glorious.) 

Welcome to “What I Really Eat”, the series.

Now this is not to say that I wouldn't routinely eat the things I post up on here. If I've spent Sunday testing something that we can eat for dinner, then of course, that’s what’s on the table.

"What I really eat" are my "Iron Chef" meals. My pantry meals. Shit, my fridge is empty meals. The things that come out of necessity and lack of time. The ingredient list will usually be small and the execution usually simple. Something that is less of a recipe and more of a guideline. If something exceptionally awesome comes out of my Sunday night scramble, it will get posted as a “What I Really Eat” and probably be accompanied with a not-my-best photo.

We can’t have it all.


Roasted Sprouts & Squash

Ingredients:

1 pound brussels sprouts, halved

1 to 2 delicata squash, sliced into ¼ inch rings -- seeds scooped out

drizzle of olive oil or if available bacon grease

1 tablespoon of maple syrup

chili powder to taste

salt and pepper to taste

Directions:

Heat oven to 400 degrees.

On a large sheet pan that has hopefully been recently used to cook bacon, spread out the squash rings and sprout halves evenly. (If bacon grease is not available, just drizzle well with olive oil)

Drizzle 1 tablespoon of maple syrup over vegetables, then season with salt, pepper, and chili powder to taste. Give the vegetables a quick toss to coat in the syrup, fat, and spices.

Roast in the oven for approximately 30 to 40 minutes, tossing occasionally so the veggies caramelize evenly.

Serves 4 as a side