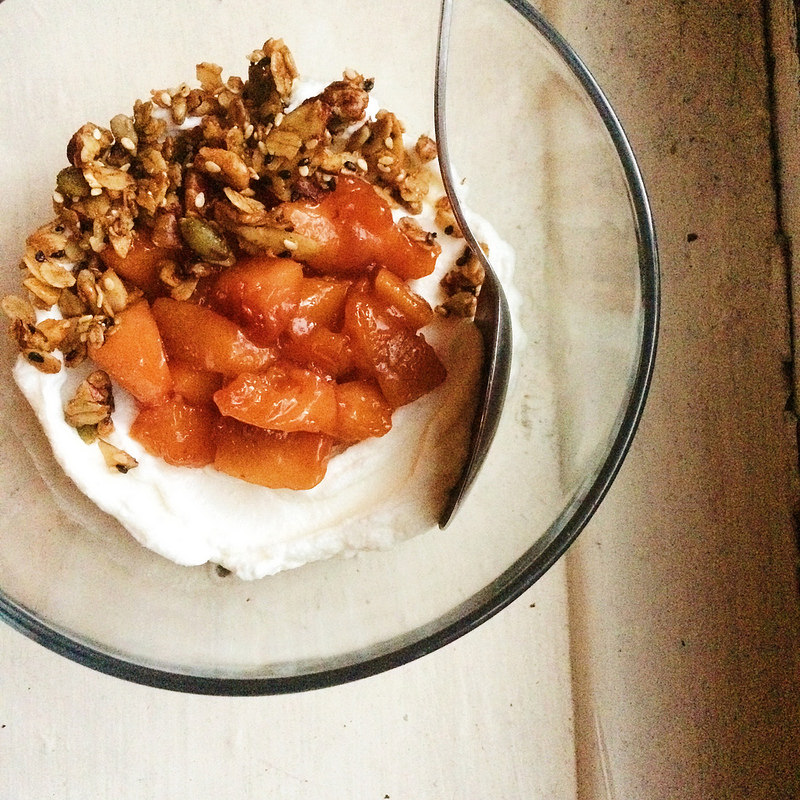
Nectarine Tart with Hazelnut Crust

Down with the simple recipes I’ve been posting all week! And hear, hear to something a bit more complicated! Check out that ingredient list! Finally more than 5 items needed! Are you with me?!

Honestly this isn’t that complicated at all. But it does look fancy though, huh?

Most of the time it takes is hands off. Refrigeration and cooling time are what take this recipe up a notch, timewise. But that’s what weekends are for, amirite?

I’m sure this would also work with any fruit you have on hand. The custard is very neutral tasting so any summer fruit spread out over top would be both tasty and pretty looking. But that’s not to say the filling isn’t exciting. Just versatile.

I’m also pretty sure for the nut crust any variety of ground nut could work, but don’t hold me to that.

This could also easily become vegan if the honey in the filling is switched out for maple syrup or other sweetener and the butter in the crust is switched out for coconut oil.


Nectarine Tart with Hazelnut Crust

Ingredients:

Filling

1 can cold full fat coconut milk

¼ cup chia seeds

zest and juice of 1 lemon

1 teaspoon vanilla

3 tablespoons honey

1 tablespoon tapioca starch

Crust

2 cups ground lightly toasted hazelnuts

2 tablespoons maple syrup

dash of cinnamon

3 tablespoons butter

Topping

3 nectarines, halved, pitted, and sliced thinly.

2 to 3 tablespoons of peach preserves, warmed (or whatever you have around - it probably wouldn’t matter much. I used a strawberry-peach jam)

Directions:

In a bowl combine the coconut milk, chia seeds, zest, juice, vanilla, honey and tapioca starch. Whisk well to incorporate and then cover with plastic wrap. Refrigerate for at least 3 hours and up to overnight.

Heat oven to 350 degrees.

In a bowl combine the ground hazelnuts, the maple syrup and the cinnamon. Using your hands get the butter well incorporated into the nut mixture.

Pour nut and butter mixture into a 10-inch tart pan with a removable bottom. Press the mixture into the pan to cover the bottom and sides evenly.

Bake for about 20 minutes or until sides the sides become a gorgeous golden brown. If at any point in the baking you see part of the side begin to slump down just press it back into place with the back of a spoon.

Cool crust completely.

Once your filling has properly chilled and thickened (you should be able to run your finger or a spoon through the filling and not have it fall directly back in place) you can fill the cooled crust, spreading it evenly throughout.

Lay the nectarine slices one by one next to each other, overlapping them slightly along the edge of the crust. When that layer is finished, overlap slices in the remaining space in the center of the tart but layer the slices going in the opposite direction of the outside layer.

Take your warmed preserves and using a pastry brush, lightly glaze the nectarine slices.

Cover and chill the tart for another hour before serving.

Tart will keep for about a day in the fridge before the crust starts to get a bit soggy. Still delish.

Yield: 1 ten-inch tart

Corn and Peppers

In continuation of the Mama Lunetta Summer Classic series - here’s yet another childhood mainstay. I happened to have corn in the freezer from my CSA two weeks ago and I got a pepper in last week’s. And that meant that this HAD.TO.HAPPEN.

Since Summer vegetables require little to no anything to be awesome, I do realize that I’ve been posting things that really aren’t all that eventful. Sorry. Are you bored of me yet? These are just the recipes that I think of when we’re in this season. I’ve also been relying greatly on my farm share to inspire my cooking each week.

When I got the corn, I didn’t have time to use it right away and you should use fresh corn within a day or two. So I quickly blanched the cobs and then cut off the kernels and froze them.Then last week I received a beautiful green pepper in my share and I immediately thought of Mom’s Corn and Peppers, a summer comfort food.

Typically when people think comfort foods, we think of winter stews, soups, and casseroles. Things that take a long time and require the warmth of the oven. They warm both home and soul. But when I think back on my mother’s cooking, it’s her summer standbys, that remind me of home and comfort. Her corn and peppers, fresh sauce, blackberry sauce, ratatouille, tabbouleh, and her mint iced tea. Those are my “comfort foods”. Although I have been making slight changes here and there, de-grainifying the stuffed zucchini, using maple syrup instead of sugar in the blackberry sauce. Through and through the recipes still have the same backbone. Super simple dishes that were inspired by what she brought in from her garden each day, similar to how I’m waiting on my farm share each week.

#longlivesummer


Corn and Peppers

Ingredients:

4 ears fresh corn, shucked and sheared from the cobs** (approximately 2 cups)

1 medium onion, chopped

1 large sweet pepper --- my mother always grew Italians but my CSA gave me a green bell pepper so that’s what I used here

1 tablespoon grassfed butter

salt and pepper to taste

Directions:

Get your butter melting down in a large saute pan or cast iron skillet.

Once melted add in your onions and saute them until soft, translucent, and slightly caramelized.

Add in your corn and peppers next. Saute with onions until soft and tender. Salt and pepper to taste.

Serves 4 as a side

Blackberry Sauce with Olive Oil Yogurt Cake

I was aiming to post this before a weekend since it’s a dessert and baked things sometimes take a bit more time to produce but I wanted to get this up here before blackberries are but a distant memory of the summer.

The cake itself is super quick and easy. The sauce takes a bit more hands on time but it’s worth every second, at least I think so. Again, this is one of those summer standbys. We have huge blackberry bushes lining the entire length of my mother’s giant garden in Connecticut.

So I grew up eating this sauce all of August on top of Eggo waffles and on ice cream and on a simple yellow round cake that is similar to the cake I made here.

This cake though is gluten-free. It also utilizes yogurt, which for awhile there I was drowning in after having worked on a shoot for a certain big Greek yogurt company. Yay for perks of working on the culinary team! I made out like a damn bandit.

With the sauce I also decided to see if I could use something less refined like maple syrup instead of regular sugar and it worked like a charm. Careful using a wooden spoon with this, it will get stained a lovely shade of magenta.

stainedspoon.jpg

I think it’s an improvement really.


Blackberry Sauce

Ingredients:

1 ½ pints blackberries

¼ cup maple syrup (you may need to add more depending on the sweetness of your berries)

squeeze of half a lemon

Directions:

Throw your blackberries, maple syrup, and lemon juice into a small saucepan on a low to medium heat. Stirring occasionally and keeping at a low simmer. It will take the berries about 40 minutes to break down and for the sauce to be the right consistency. It will seem juicier than you think it should. But wait there’s more to come.

After 40 minutes, take your cooked berries off the heat. Gather a medium bowl, a small-medium fine mesh strainer and a spoon.

Place the strainer over the bowl and pour just a bit of the sauce into the strainer. Using the back of the spoon begin to press on the remaining chunky pulp getting as much solid berry as you can through the strainer. You should be left with mainly seeds once you’ve gotten as much as you can out of the pulp. Dump the seeds and start again with another pour of cooked berries. Continue in small batches until your saucepan is empty and your bowl is now full of strained berry puree.

Use this sauce to pour over the below cake, or other cake of your choice. Or ice cream. Or waffles. Or yogurt. Or anything…….should last about 2 weeks in the fridge.

Yield: approximately 2 cups

Olive Oil Yogurt Cake

adapted lightly from this cake from Canelle et Vanille

Yield: 1 nine inch round cake

Ingredients:

small amount of butter for greasing/flouring pan

3 eggs

1 cup raw sugar

1 cup full fat Greek yogurt

1/2 cup olive oil

Zest of 1 lemon

1 cup brown rice flour (mine was sprouted and organic), plus a bit extra to flour pan.

1/2 cup millet flour

2 tablespoons tapioca starch

1 tablespoon baking powder

1/2 teaspoon salt

Directions:

Heat oven to 350 degrees

Line a round 9-inch cake pan with parchment paper. Then butter and flour the sides of the pan.

Set aside.

In a large bowl, whisk together the eggs, sugar, yogurt, olive oil and lemon zest.

Once mixed, add in the brown rice flour, millet flour, tapioca starch, baking powder and salt. Whisk again to thoroughly incorporate.

Pour into the cake pan and spread it out evenly.

Bake cake for 30 to 40 minutes or until it’s edges have turned a lovely golden brown and a cake tester comes out clean.

Let cake cool in pan and then run a knife around the edges and flip onto a plate. Remove the parchment paper from the bottom of the cake then take your serving plate or platter and flip cake again so the top is now the top once more.

Serve slices with blackberry sauce drizzled on top and I mean it’s not like ice cream on the side would be out of place either.

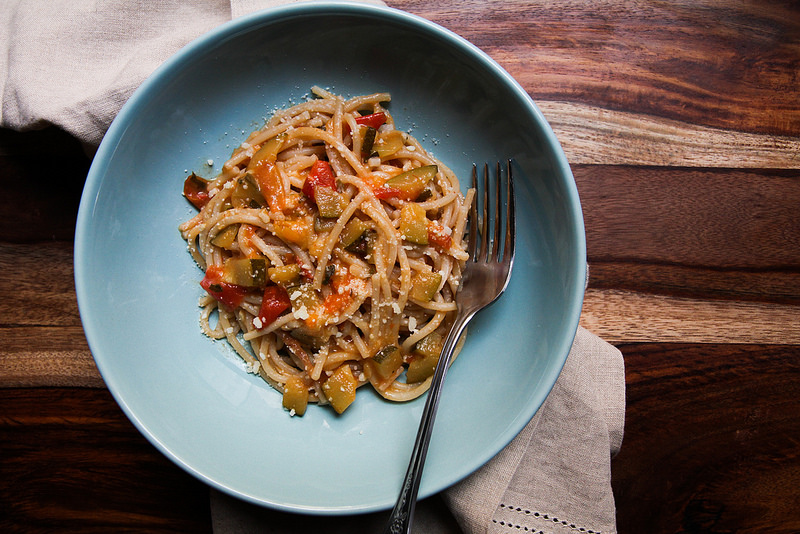
Fresh Sauce

This is a Mama Lunetta classic, right here. Not like my pseudo mom classic of stuffed zucchini. I messed with that.

You don’t mess with the fresh sauce.

The fresh sauce is quintessentially summer for me. This sauce means my mama had so many tomatoes in the garden that we were willing to sacrifice eating them raw to melting them down into a silky, steamy sauce.

This isn’t a red sauce. This is a fresh sauce. It’s not the type you spend all day cooking and coaxing to become the most mind-blowing deliciousness you’ve ever put into your mouth. That is best left for winter. Red sauce is best left for snow. It’s summer! This is fresh sauce. From start to finish this sauce should only take around 30 minutes. You don’t wanna cook these perfect summer tomatoes to death, you want them to still taste fresh. This is how I save summer.

Since beginning my seasonal eating journey, I’ve really learned to appreciate and respect the seasons. And man oh man do I not want to see summer go. The berries, stone fruits, and tomatoes along with it. So in several desperate attempts to preserve it, I’ve been stuffing my freezer with berry filled treats, stone fruit compotes and crisps, and this sauce. Just so that when winter is here and seeming never-ending, I can sneak a little bit of summer out and into my kitchen.

P.s. Of course after I photographed this recipe I learned all sorts of things about tomatoes today and discovered I typically make this sauce with the “wrong” type of tomatoes. But listen, the farmer’s market totally had tomato “seconds” and they were half price. They were just a little ugly, that’s all. But they tasted wonderful. That’s all ya really need. Really good in season tomatoes. I wouldn’t try and do this with canned. Just sayin’.

So where was I, oh yes. Apparently Romas would be best. But sauce is sauce dude. August tomatoes are still August tomatoes. Use what you have. I don’t discriminate. I mean even if it’s a little watery all that means is that when you finish your bowl of whatever you dumped the sauce on, at the end there will be this lovely, soupy tablespoon or so of cheese tomato water and I mean, you totally just drink that, right? Like you put down your fork and you put the bowl to your mouth and tip back and you drink it. I won’t tell if you do, because that’s definitely, definitely what I do. Shhh….


Fresh Sauce

Ingredients:

2 pounds fresh tomatoes

4 cloves of garlic, minced

1 tablespoon grass fed butter

scant ¼ cup of grated parmesan cheese

salt and pepper to taste

Directions:

Start by bringing water to a boil in a large sauce pot.

Using a knife make a small “X” mark on the bottom of each of your tomatoes.

When the water is boiling drop your tomatoes in and watch for the skin to begin to split. This should only take 30 seconds to a minute to happen. Scoop the tomatoes out with a slotted spoon one by one as they start to split and gently place onto a flat surface to cool.

Once cool enough to handle, peel the skin of the tomatoes off. ***

Give your naked tomatoes a rough chop. They'll be super juicy! Save as much as that juice as you can to put into pot with tomatoes!

In a large sauce pot over a medium heat dump in your roughly chopped tomatoes. Create a small space in the middle of the tomatoes and dump in the minced garlic. Stir the garlic into the tomatoes. Let the sauce come to a boil then lower heat to a simmer. Stir occasionally and use the back of a wooden spoon to break up any large chunks of tomato. The sauce should take about 20 to 30 minutes to breakdown. Around 30 minutes in, add in your tablespoon of butter and ¼ cup of parmesan. Stir into sauce. Turn off heat. Taste for salt and pepper. Add as needed.

Yield: about 1 quart

***Note: I’ve totally done this lazily and not taken the skins off. You can absolutely skip this part if you wouldn’t mind the skin. Just start at the rough chop part and move on!

Roasted Strawberry Balsamic Glaze

 There was a point this summer where I was up to my damn eyeballs in strawberries.

My mother and I went strawberry picking at a local farm in Connecticut and we picked 30 pounds of berries. 30 POUNDS! Oops! 

We made a ton of jam, we made loads of shortcake, and we gave a bunch away to friends. And we still had strawberries.

The thing with strawberries though is, they last all of two seconds, and then they start to wither and wrinkle and generally mold over. Especially the kind you freshly pick. They’re just not built to withstand cross country shipping like their sturdier grocery store counterparts.

So we had to start thinking of creative ways to use them.

This recipe is one I came up with that weekend I was buried in berries.

It’s an interesting thing cooking with the seasons. I was sad since I didn’t have my shit together enough in June to get many strawberry recipes in and up on this here blog thing. But, I’m posting it now, since I’ve realized that you can still get strawberries locally here and there at the markets. Even if they’re suspicious ones.

This glaze is ridiculously easy to do, I feel bad even calling it a recipe. But my mother and a friend could not get over how much they enjoyed it.

Please don’t judge me and my lack of steak cooking skills. I’m not big on the whole “rare” steak thing and I’m sure this is a touch overcooked for many steak connoisseurs. None the less, this glaze was tasty and that’s what I’m really selling here. So cook those steaks (or chicken, or pork or whatever!) to perfection and then smother it in this sauce. I hope you won’t be disappointed. We definitely weren’t.


Roasted Strawberry Balsamic Glaze

Ingredients:

1 cup strawberries, halved

1 cup balsamic vinegar

Directions:

Heat oven to 350 degrees.

Place vinegar in a small saucepan and bring to a boil. Reduce heat to low and let vinegar reduce by half, until thick and syrupy. About 30 to 40 minutes.

While vinegar is reducing, spread out the halved strawberries on a sheet pan. Roast at 350 until soft and juicy. Approximately 20 to 30 minutes.

Transfer your cooked berries to a bowl and then either mash them well with a fork or for a super smooth sauce ---- use a blender, food processor, or an emulsifier.

Depending on the timing, your balsamic vinegar should be reduced by now.

Take off the heat and pour into a serving bowl if you wish or just leave in pan. Take your berry sauce and mix into vinegar reduction.

Use as a glaze for any meat. I used it with steak!

Yield: approximately 1 cup of sauce

Butter and Dill Carrots

Every summer I get to spend a long weekend in the beautiful state of Maine visiting family. It’s the kind of place where there’s a mile between all the houses and you don’t hear anything but sounds of nature all day long. They live in the dead middle of the state and their house is surrounded by nothing but trees and open skies.

My cousin Evelyn cultivates a huge, beautiful garden. This year’s bean stalks were taller than me and there were tomatoes for days.

Late one morning she harvested a few pounds of baby carrots and barely ten minutes later they were simmering on the stove top destined for lunch.

What she served us was so simple and also just so good. The combination of flavors was something I’ve never encountered before. It felt both fresh and rich at the same time. It was so different from anything I've ever had that I asked for permission to share it on here.

The dill and carrots pictured are her gorgeous produce. I mean look at those cute little "tails"!


Butter and Dill Carrots

Evelyn’s Recipe

Ingredients

1 pound fresh carrots, cleaned and trimmed of their tops - ideally the type just recently yanked out of the ground, and on the smaller side if possible. Halve or quarter bigger carrots so they cook through equally

1 tablespoon grass fed butter

1 heaping tablespoon chopped fresh dill

salt to taste

Directions

Bring water to a boil in a 1 quart sauce pot.

Once the water is boiling drop in your carrots. Cook them until just fork tender, about 6 to 7 minutes. This could take longer depending on the size of your carrots.

Strain the water from the carrots and place in serving bowl. While the carrots are still warm stir in butter and dill until the butter has melted and the dill has evenly distributed.

Salt to taste and serve.

Serves 4 as a side

Slightly Spicy Slaw

So I went to Whole Foods one day after the green market for cat food although I was super hungry and me and grocery shopping while hungry never ends in a good way. Believe me, I could’ve made it home for food. Really. But I snuck past the food bar and of course lost my resolve. Now, mistake? Or kismet? I’ve decided on definitely meant to be because I stumbled across something that I’ve probably thought about once a day since. It was called “Firecracker Slaw.” If there’s one thing I adore in life, it’s slaw. I’m that gross person who always eats the tiny cup of half warm coleslaw sent along with that pickle at the diner. As of recently I’ve also started to gravitate towards more vinegar-based dressings and have discovered a whole new world of slaw making.

This Firecracker Slaw was the stuff of my dreams. Not sure if anybody’s noticing a pattern going on, but I like things spicy around here. It was beautifully colored - the red of the cabbage, there were red, yellow and orange bell peppers thrown in, and there they were, slivers of jalapeno. My recreation does not taste exactly like the wholefoods version, but it’s close and it’s GOOD.

Hey, little side note, you’ll notice there’s something called kohlrabi in this. Kohlrabi? Kohlrabi anyone? I received three kohlrabi in my farmshare and was like….what the f….are these?? Since learning more about them, they’ve all gone into slaws and I couldn’t of been more pleased. If you don’t have any kohlrabi lying around or haven’t a clue what it even is (been there girl) just sub in a ½ head of green cabbage instead. Kohlrabi are in the same family as cabbage and broccoli.

14694186409_844c85a898_c.jpg

Hmmm…..broccoli slaw….


Slightly Spicy Slaw

inspired by Whole Foods’ “Firecracker Slaw”

Ingredients:

Slaw

½ head of red cabbage, cored and sliced into long thin strips

1 bell pepper, orange, yellow, or red for color, sliced into long thin strips

½ cucumber, sliced into matchsticks

½ red onion, sliced thinly

1 kohlrabi, peeled and shredded

3 carrots, shredded

1 jalapeno pepper, de-ribbed and de-seeded (or leave in for more heat), sliced into super thin matchsticks

Dressing

3 tablespoons olive oil

1 ½ tablespoons Red wine vinegar

1 tablespoon dijon mustard

2 teaspoons honey

salt and pepper to taste

Directions:

Take all your prepped vegetables and toss them together in a large bowl.

Combine dressing ingredients together in a small bowl and then pour over your slaw. Toss slaw again to distribute dressing.

You can eat it right away, but I always find slaw better when it’s sat a bit and had time to meld it’s flavors and wilt a little.

Stuffed Zucchini

Do you have zucchinis around that are the size of a limb or a small child? Are you overwhelmed, maybe not in size but in quantity? It’s about that time of year where the zukes start taking over the garden. You go down there, and WHOA! Monster zucchinis everywhere! I swear they weren’t that big the last time I was down here! What my mother would do with these giants was stuff them silly and cover them in melted cheese and call it dinner. I have fond, fond memories of zukes the size of me. I’m currently no where near a garden and I’m still overwhelmed with zucchini. My CSA is hurling them at me and a co-worker brought me in one, that I swear to you, was the size of my leg.

photo.JPG

So it was about time for me to whip this childhood classic out. This isn’t quite my mom’s recipe, but it was one of those summer comfort foods I had to figure out how to recreate. Her's involves stovetop brand stuffing, which is, SO good. But I wanted to up the protein and avoid the grains. So this version uses ground beef, a ton of vegetables, and some of the seed pulp that you scoop out at the beginning of the process.

14636819519_0200e94ed6_c.jpg

I’ve played around with other meats too, like Italian sausage and chorizo and thrown in different veggies. The kale ended up in here just because I had some hanging out in the crisper. This is one of those recipes that has endless ways you can change it up - meat, spice, or veg-wise. Get creative. I don’t think it could taste bad! Use what you got!

I like to serve mine with a fresh tomato salad on the side and maybe even a little sour cream if I’m feeling saucy.

14823472165_6b5f0c8de7_c.jpg

Don’t hate on the one tablespoon of tomato paste, I know, annoying, but it really adds body. Here’s what I do when I only use a little bit from the can: scoop it out onto a square of saran wrap and fold it up into a little square. Then throw into the freezer. Next time you need some tomato paste just hack off a bit from your frozen square.

14636816139_2a35d3889f_c.jpg

Stuffed Zucchini

Ingredients:

1 large zucchini (or 4 small-medium ones) halved, with seeds scooped out (reserve 1 cup of seed pulp)

1 lb ground beef

1 medium onion, chopped

1 Italian pepper, diced

1 cup shredded kale

1 cup of reserved zucchini seed pulp (from above)

1 tablespoon tomato paste

½ teaspoon oregano

½ teaspoon cumin

½ teaspoon paprika

1 tablespoon chili powder

salt and pepper

1 cup quartered baby tomatoes (or diced regular tomatoes)

Optional: cheese for melting (a hard pecorino or parmesan would work ((what I did)) but so would a cheddar or mozzarella – the theme of this recipe is pretty much anything goes)

Directions:

Heat oven to 350 degrees

Take your scooped out zucchini halves and place them on a sheet pan or in a baking dish. Lightly salt them. Pour about 3 cups of water in the bottom of your baking pan, there should be about an inch of water in the pan around the squash. (This can be easier to do when the pan is already inside of the oven.) Bake squash in oven for about 30 minutes or until squash is tender when pierced with a fork.

While the zucchini is baking, brown your ground beef. When the meat is browned, remove from the pan with a slotted spoon and set aside on a plate. Using the rendered fat from the meat, begin to sauté your onions and peppers over a medium heat. When the onions and peppers have softened, throw in your kale, and reserved seed pulp. Wait until your kale has wilted and then add back in your browned meat. At this point also add in your tomato paste, oregano, cumin, paprika, and chili powder. Stir everything together to combine well and then salt and pepper to taste. Let cook and meld together for about 5 minutes. Lastly add in your tomatoes and cook just until wrinkly.

Now it’s time to fill those oven tender squash. If you’re melting cheese on top, feel free to use the same pan - most of the water has probably evaporated but if not, move the zucchini off and pour out lingering water and then lay squash back down. Fill each half equally with your meat-veg mix and then sprinkle your cheese on top, if using. Throw back into oven until cheese is golden and bubbly.

If you’re not using the cheese then stuff your squash and serve!