Plum Cake

I’m not to be trusted, clearly.

Well I’m here though, now, let’s focus on that. And with this cake no less.

So funny thing, I thought the plums would be on top, similar to another olive oil cake I’ve made. I guess this batter was a bit less structurally sound. 

I peeked in about halfway through and saw they had disappeared. Oops. 

I had one of those, well let’s hope for the best moments and went on with the baking.

Lucky for me, you, and the party I went to later that night, it was for the best! 

And those cute little jammy surprises were as lovely as you might imagine they would be.

Eat up buttercup!


This is essentially the same cake that I used here.

Plum Cake

adapted lightly from this cake from Canelle et Vanille

Yield: 1 nine inch round cake

Ingredients:

small amount of butter for greasing/flouring pan

3 eggs

1 cup raw sugar

1 cup full fat greek yogurt

1/2 cup olive oil

Zest of 1 lemon

1 cup brown rice flour (mine was sprouted and organic), plus a bit extra to flour pan.

1/2 cup millet flour

2 tablespoons tapioca starch

1 tablespoon baking powder

1/2 teaspoon salt

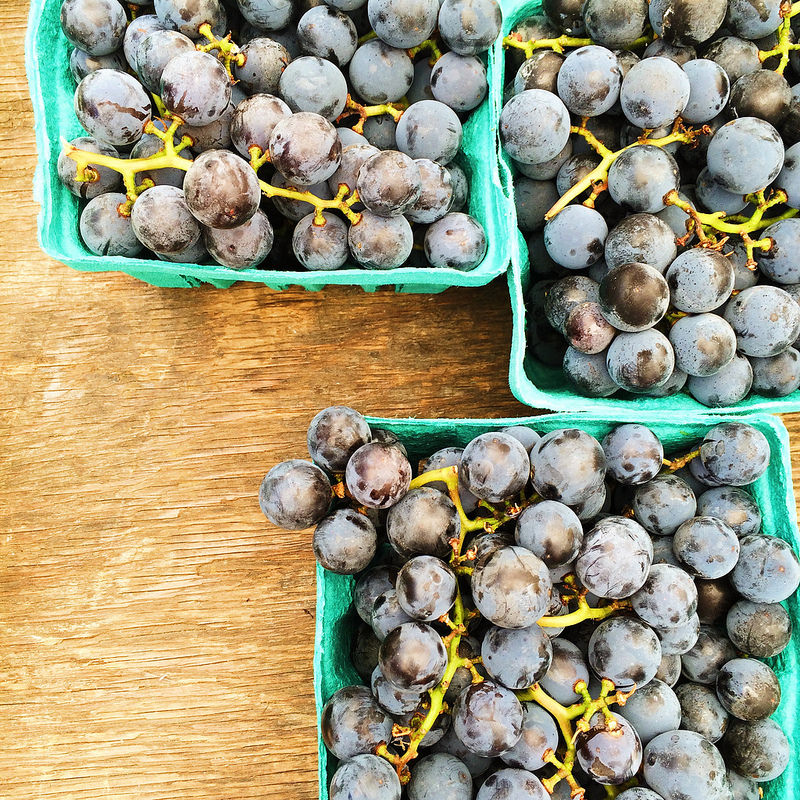
5 italian plums, halved and pitted

Directions:

Heat oven to 350 degrees

Line a round 9-inch cake pan with parchment paper. Then butter and flour the sides of the pan.

Set aside.

In a large bowl, whisk together the eggs, sugar, yogurt, olive oil and lemon zest.

Once mixed, add in the brown rice flour, millet flour, tapioca starch, baking powder and salt. Whisk again to thoroughly incorporate.

Pour into the cake pan and spread it out evenly.

Gently place plum halves all over the top of the batter. 

Bake cake for 30 to 40 minutes or until it’s edges have turned a lovely golden brown and a cake tester comes out clean.

Let cake cool in pan and then run a knife around the edges and flip onto a plate. Remove the parchment paper from the bottom of the cake then take your serving plate or platter and flip cake again so the top is now the top once more.

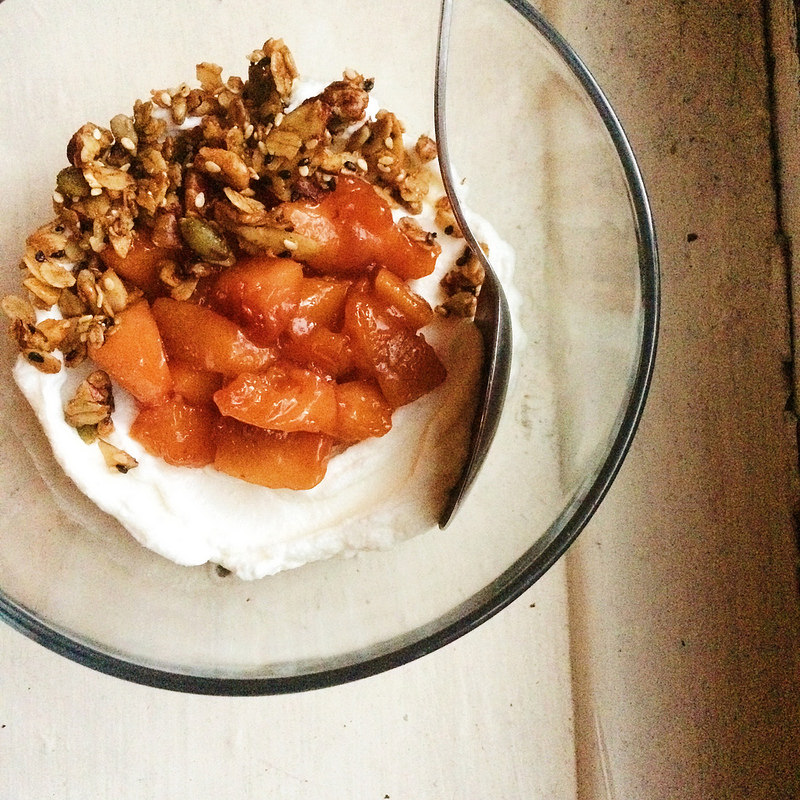
I served mine with a dollop of greek yogurt on top.

Pickled Carrots

Remember how I said everything should be pickled? Well, everything should be pickled.

And thanks to Food52 ---- who teach me the right way to do lots of things, I pickled some carrots. Some very purdy purple carrots from my CSA.

I have this strong urge a lot of the time to resist in consuming certain things because of how beautiful or shortlasting they are. Which I realize, is downright crazy and counterproductive. But sometimes, I still figure out ways to prolong their demise. Like pickling them or baking them into something.

Now pickling carrots isn’t so much of a novel idea, although it’s relatively new to me. Before this summer, I didn’t really realize you could pickle more than...pickles. (What a wretched life I led before coming into the good graces of vinegar.)

Obvs, I discovered things like Pickled Red Onions. But then on an outing to a fancy restaurant in SoHo, in lieu of the usual bread basket, the waiter passed around complimentary red grapes and pickled carrots. Everyone was thoroughly pleased with the combination and it was interesting and different to boot, even among the foodiest of foodies.

((To briefly veer off course a bit, can I tell you about the complimentary bacon grease popcorn I ate this weekend? Um, what? Yes. Exactly. It’s everything you’re thinking right now. This was at the same restaurant of Pickled Peach fame. Pickled peaches, yet another revelation.))

Okay so getting back to business. These carrots were so gorgeous, at first I wasn’t sure what to do with them. Eating them raw seemed just too boring but roasting or cooking them seemed too harsh an out.

However, preserving them in a fabulous magenta pickling liquid to last at least another couple weeks seemed perfectly appropriate.


Pickled Carrots

as guided by this Food52 article

1 pound carrots, trimmed of their tops, scrubbed, and halved

2 cups white wine vinegar

⅔ cup water

⅓ cup honey

2 ½ tablespoons salt

1 tablespoon peppercorns

Place the halved carrots in a large glass mixing bowl.

In a small saucepan bring the vinegar, water, honey, salt and peppercorns to a boil. Once boiling remove from heat and pour the hot pickling liquid over the carrots. To keep carrots submerged in the brine, place a plate on top of them.

Let carrots and brine sit and cool completely.

Once cool, place carrots and brine in a sealed container. 

Will last 3 weeks to a month in the refrigerator.

Makes about 1 quart

Zesty Zucchini Soup

It’s safe to assume we all still have squash in our crispers, yes?

And was it yesterday morning, that I sorta, kinda, a little bit, wished I had grabbed a cardigan before leaving the apartment?

OH NO IT’S STARTING!!! Don’t.freak.out.

The drastic change between Saturday’s sweat show and Monday morning’s “where’s my sweater?” weather begs to have a summery twist on a comforting, warm bowl of soup.

I’ve actually been waiting and waiting to share this. I had made this during that time when squash was threatening to overtake my refrigerator. But every week seemed just too early to be like “eat boiling hot liquid for lunch or dinner, whydontcha!”

But it’s time has come. I keep telling myself to be excited for soup and stews and chili.

Here’s how I’ll start.


Zesty Zucchini Soup

Ingredients:

1 tablespoon of grass fed butter, or other fat

1 small onion, diced

1 jalapeno, minced

1 clove garlic, minced

2 small-medium green zucchini, sliced into thin rounds

1 small yellow zucchini or yellow squash, sliced into thin rounds

32 oz. (4 cups) chicken broth

½ teaspoon of cumin

1 teaspoon of paprika

cayenne to taste

salt and pepper to taste

¼ cup grass fed heavy cream

Directions:

Get the butter melting in a large pot over a medium heat. Once melted saute onions, jalapeno, and garlic in pan until onions are soft, translucent, and a bit caramelized. About 5 minutes.

Add the squash to the pot and cook until just starting to get tender, another 5 to 10 minutes. (They’ll continue to cook in the broth and get soft.)

Add broth to the pot as well as cumin, paprika, cayenne, salt and pepper. Bring to a boil and then lower to a simmer.

Simmer soup until the squash is soft and tender, approximately another 10 to 15 minutes.

Turn off heat and slowly stir in the heavy cream.

Yield: approximately 2 quarts

Baked Peaches

I've been posting desserts that just take a buncha time. Like this has to chill for like 8 years in the fridge and don't worry, straining all the seeds out of this will take no time at all. No big deal. It's worth ittttt, I say. Blah blah blah. ((Wait listen….totally worth it --- both of them))

I’m just trying to make a point for today’s post. These peaches are the easiest to throw together and you need to make them right now before peaches are gone FOREVER.

You'll soon learn I don't lack for any exaggeration or excitement.

At first I wasn’t totally sold on them, I’m gonna assume because it was like 10 in the morning and it was already sweltering hot out and eating hot fruit first thing in the AM was just not my cup of tea at that moment. It was so hot in my kitchen that my cream wouldn’t even whip. Hence the barely whipped cream in the photos, but I assure you that was not the problem. I’ve been known to just pour cream onto berries just straight from the bottle.

What?

You don’t do that? You ain’t even lived.

Anyways. The point here is. Later on, after dinner, I ate one cold from the fridge (with just straight cream drizzled on top.) And if that wasn’t the most tasty, refreshing, lovely bit of dessert.

So really, these work warm from the oven or cold from the crisper. Will last in a fridge a day or two before topping starts to get soggy, but they probably won’t be there that long, if you know what I’m sayin’.


Baked Peaches

adapted slightly from this recipe over at smitten kitchen

Ingredients:

4 ripe peaches, halved and pitted

½ cup almond flour

⅓ cup coconut palm sugar

a pinch of salt

a dash of cinnamon

3 tablespoons butter

Whipped cream for garnish, optional

Directions:

Heat oven to 350 degrees

Mix almond flour, coconut palm sugar, salt, and cinnamon together in a small bowl. Incorporate butter into the mixture with hands until it’s evenly distributed.

Divide mixture equally among peaches, filling each of the peach’s centers and lightly pressing the mixture down to cover the peaches’ surface..

Bake for about an hour or until topping is golden brown and crisped, and peach is soft and tender.

Vegan or strict Paleo option -- I bet you could switch out that butter for coconut oil without issue.

Can serve warm or cold.

Serves 8

Eggplant Parmesan

Man, this recipe seems like a to-do all typed out. I guess anything with multiple cooking steps is going to look a little crazy. Re-inventing the wheel with this one? No, not really. But when you have eggplants, what’s better to do with them than make eggplant parm? Probably many things, but flow with me here.

Truth be told, I am not the biggest eggplant fan. I think it might be it’s skin? At times I find it plasticky. I do best when it’s sliced super thin or cubed into the tiniest of squares that will melt into a sauce. And I am sure I am not alone in the belief that the act of frying makes all things edible.

One change I made here was just to sub out the usual bread crumbs for a mix of almond meal and grated parmesan. Works like a charm. I also find my latest presentation to be just the prettiest. I realize though, that most people probably don’t have a giant circular pan like that. In the instructions I give a few suggestions as to how else you can bake the eggplant.

I’ve done this several times and I’ve almost always had the perfect amount of egg and breading to eggplant slices. But if for some reason you end up with extra eggplant slices, I would just roast them up with a little olive oil and salt and pepper when you throw the parm in the oven.

If you end up with extra breading, since it’s not like it’s getting contaminated by meat or something, just freeze it up to use at a later time. Er, well I guess some egg might get all up in there, but I would probably still freeze it. It works great for chicken parm. Although I did find it a bit heavy for squash blossoms when I was experimenting with them. But usually this is my go-to breading for everything.

Last time I had a bit extra, I had a green tomato hanging out on the counter.

I’m sure you can put together what happened next.


Eggplant Parmesan

Ingredients:

2 medium to large eggplants

salt (for sweating)

2 large eggs

1 cup almond flour

1 cup grated parmesan

1 tablespoon fresh parsley, finely chopped (or a good pinch of dried)

salt and pepper to taste

approximately ¼ cup olive oil for frying

2 cups of tomato sauce, either Fresh Sauce or a good homemade or jarred red sauce.

8 oz. fresh mozzarella, sliced thin or 1 cup shredded mozzarella

Directions:

Using a mandoline or a knife, slice the eggplant into thin ¼ inch disks.

Lay out disks on a flat surface like a cutting board or sheet pan and lightly salt the eggplant. Let sit and sweat for approximately 30 minutes.

Meanwhile, prepare your “breading” station. In a large bowl beat two large eggs together. In a large plate or baking dish combine the almond flour, parmesan, parsley, and salt and pepper.

After 30 minutes, using a paper towel, dry the “sweat” off the eggplant slices and place slices in the bowl with the beaten eggs. Swish around eggplant to cover all slices with egg.

I find it easiest to “bread” all the slices before frying instead of trying to multitask breading and frying at the same time. Something always gets backed up.

One by one take each egg soaked slice and dip each side into the almond flour-parmesan “breading” and lay them down on a flat surface to wait to be fried up.

Once all the slices are breaded, heat about half of the olive oil in a medium to large saute pan over a medium heat. While this is heating, prepare a plate with paper towels to place finished fried slices onto.

When the oil is hot enough (you can dip the end of a wooden spoon into the oil and see if it sizzles) place as many eggplant slices that will fit, into the pan. Fry until golden on the first side and do the same with the second side. Take off heat and place on paper toweled plate to drain. Do this with all the slices. About halfway through frying I like to start with some fresh oil since the almond flour has a tendency to fall off a little more and burn up pretty quick. So I pour off the hot oil into a heat safe container to cool a bit before throwing out and then I carefully wipe out the pan with a paper towel. Then I pour in the remaining olive oil and bring it up to heat and keep on frying.

Once all your eggplant is fried turn on the oven to 350 degrees.

Grab the eggplant, two cups of sauce, and mozzarella cheese.

Depending on the type of baking pan you have available begin layering the eggplant in a way that makes the most sense to you.

As you can see in the pictures, I have a 1-inch deep circular roasting pan, so I overlapped mine in circles, starting with a splash of sauce on the bottom of the pan and then layering the slices one by one around, adding the rest of the sauce and then covering in cheese. If you only have a flat pan, or baking dish you could do all the slices in one layer, with spoonful of sauce on top of each slice and then a piece of cheese on top of that. Or you could layer them up in a baking dish like a lasagna! Whatever works. Just get that sauce and cheese on there!

Bake the eggplant parm for about 40 minutes or until cheese is golden and bubbly.

Serves 8

Nectarine Tart with Hazelnut Crust

Down with the simple recipes I’ve been posting all week! And hear, hear to something a bit more complicated! Check out that ingredient list! Finally more than 5 items needed! Are you with me?!

Honestly this isn’t that complicated at all. But it does look fancy though, huh?

Most of the time it takes is hands off. Refrigeration and cooling time are what take this recipe up a notch, timewise. But that’s what weekends are for, amirite?

I’m sure this would also work with any fruit you have on hand. The custard is very neutral tasting so any summer fruit spread out over top would be both tasty and pretty looking. But that’s not to say the filling isn’t exciting. Just versatile.

I’m also pretty sure for the nut crust any variety of ground nut could work, but don’t hold me to that.

This could also easily become vegan if the honey in the filling is switched out for maple syrup or other sweetener and the butter in the crust is switched out for coconut oil.


Nectarine Tart with Hazelnut Crust

Ingredients:

Filling

1 can cold full fat coconut milk

¼ cup chia seeds

zest and juice of 1 lemon

1 teaspoon vanilla

3 tablespoons honey

1 tablespoon tapioca starch

Crust

2 cups ground lightly toasted hazelnuts

2 tablespoons maple syrup

dash of cinnamon

3 tablespoons butter

Topping

3 nectarines, halved, pitted, and sliced thinly.

2 to 3 tablespoons of peach preserves, warmed (or whatever you have around - it probably wouldn’t matter much. I used a strawberry-peach jam)

Directions:

In a bowl combine the coconut milk, chia seeds, zest, juice, vanilla, honey and tapioca starch. Whisk well to incorporate and then cover with plastic wrap. Refrigerate for at least 3 hours and up to overnight.

Heat oven to 350 degrees.

In a bowl combine the ground hazelnuts, the maple syrup and the cinnamon. Using your hands get the butter well incorporated into the nut mixture.

Pour nut and butter mixture into a 10-inch tart pan with a removable bottom. Press the mixture into the pan to cover the bottom and sides evenly.

Bake for about 20 minutes or until sides the sides become a gorgeous golden brown. If at any point in the baking you see part of the side begin to slump down just press it back into place with the back of a spoon.

Cool crust completely.

Once your filling has properly chilled and thickened (you should be able to run your finger or a spoon through the filling and not have it fall directly back in place) you can fill the cooled crust, spreading it evenly throughout.

Lay the nectarine slices one by one next to each other, overlapping them slightly along the edge of the crust. When that layer is finished, overlap slices in the remaining space in the center of the tart but layer the slices going in the opposite direction of the outside layer.

Take your warmed preserves and using a pastry brush, lightly glaze the nectarine slices.

Cover and chill the tart for another hour before serving.

Tart will keep for about a day in the fridge before the crust starts to get a bit soggy. Still delish.

Yield: 1 ten-inch tart

Corn and Peppers

In continuation of the Mama Lunetta Summer Classic series - here’s yet another childhood mainstay. I happened to have corn in the freezer from my CSA two weeks ago and I got a pepper in last week’s. And that meant that this HAD.TO.HAPPEN.

Since Summer vegetables require little to no anything to be awesome, I do realize that I’ve been posting things that really aren’t all that eventful. Sorry. Are you bored of me yet? These are just the recipes that I think of when we’re in this season. I’ve also been relying greatly on my farm share to inspire my cooking each week.

When I got the corn, I didn’t have time to use it right away and you should use fresh corn within a day or two. So I quickly blanched the cobs and then cut off the kernels and froze them.Then last week I received a beautiful green pepper in my share and I immediately thought of Mom’s Corn and Peppers, a summer comfort food.

Typically when people think comfort foods, we think of winter stews, soups, and casseroles. Things that take a long time and require the warmth of the oven. They warm both home and soul. But when I think back on my mother’s cooking, it’s her summer standbys, that remind me of home and comfort. Her corn and peppers, fresh sauce, blackberry sauce, ratatouille, tabbouleh, and her mint iced tea. Those are my “comfort foods”. Although I have been making slight changes here and there, de-grainifying the stuffed zucchini, using maple syrup instead of sugar in the blackberry sauce. Through and through the recipes still have the same backbone. Super simple dishes that were inspired by what she brought in from her garden each day, similar to how I’m waiting on my farm share each week.

#longlivesummer


Corn and Peppers

Ingredients:

4 ears fresh corn, shucked and sheared from the cobs** (approximately 2 cups)

1 medium onion, chopped

1 large sweet pepper --- my mother always grew Italians but my CSA gave me a green bell pepper so that’s what I used here

1 tablespoon grassfed butter

salt and pepper to taste

Directions:

Get your butter melting down in a large saute pan or cast iron skillet.

Once melted add in your onions and saute them until soft, translucent, and slightly caramelized.

Add in your corn and peppers next. Saute with onions until soft and tender. Salt and pepper to taste.

Serves 4 as a side

Blackberry Sauce with Olive Oil Yogurt Cake

I was aiming to post this before a weekend since it’s a dessert and baked things sometimes take a bit more time to produce but I wanted to get this up here before blackberries are but a distant memory of the summer.

The cake itself is super quick and easy. The sauce takes a bit more hands on time but it’s worth every second, at least I think so. Again, this is one of those summer standbys. We have huge blackberry bushes lining the entire length of my mother’s giant garden in Connecticut.

So I grew up eating this sauce all of August on top of Eggo waffles and on ice cream and on a simple yellow round cake that is similar to the cake I made here.

This cake though is gluten-free. It also utilizes yogurt, which for awhile there I was drowning in after having worked on a shoot for a certain big Greek yogurt company. Yay for perks of working on the culinary team! I made out like a damn bandit.

With the sauce I also decided to see if I could use something less refined like maple syrup instead of regular sugar and it worked like a charm. Careful using a wooden spoon with this, it will get stained a lovely shade of magenta.

stainedspoon.jpg

I think it’s an improvement really.


Blackberry Sauce

Ingredients:

1 ½ pints blackberries

¼ cup maple syrup (you may need to add more depending on the sweetness of your berries)

squeeze of half a lemon

Directions:

Throw your blackberries, maple syrup, and lemon juice into a small saucepan on a low to medium heat. Stirring occasionally and keeping at a low simmer. It will take the berries about 40 minutes to break down and for the sauce to be the right consistency. It will seem juicier than you think it should. But wait there’s more to come.

After 40 minutes, take your cooked berries off the heat. Gather a medium bowl, a small-medium fine mesh strainer and a spoon.

Place the strainer over the bowl and pour just a bit of the sauce into the strainer. Using the back of the spoon begin to press on the remaining chunky pulp getting as much solid berry as you can through the strainer. You should be left with mainly seeds once you’ve gotten as much as you can out of the pulp. Dump the seeds and start again with another pour of cooked berries. Continue in small batches until your saucepan is empty and your bowl is now full of strained berry puree.

Use this sauce to pour over the below cake, or other cake of your choice. Or ice cream. Or waffles. Or yogurt. Or anything…….should last about 2 weeks in the fridge.

Yield: approximately 2 cups

Olive Oil Yogurt Cake

adapted lightly from this cake from Canelle et Vanille

Yield: 1 nine inch round cake

Ingredients:

small amount of butter for greasing/flouring pan

3 eggs

1 cup raw sugar

1 cup full fat Greek yogurt

1/2 cup olive oil

Zest of 1 lemon

1 cup brown rice flour (mine was sprouted and organic), plus a bit extra to flour pan.

1/2 cup millet flour

2 tablespoons tapioca starch

1 tablespoon baking powder

1/2 teaspoon salt

Directions:

Heat oven to 350 degrees

Line a round 9-inch cake pan with parchment paper. Then butter and flour the sides of the pan.

Set aside.

In a large bowl, whisk together the eggs, sugar, yogurt, olive oil and lemon zest.

Once mixed, add in the brown rice flour, millet flour, tapioca starch, baking powder and salt. Whisk again to thoroughly incorporate.

Pour into the cake pan and spread it out evenly.

Bake cake for 30 to 40 minutes or until it’s edges have turned a lovely golden brown and a cake tester comes out clean.

Let cake cool in pan and then run a knife around the edges and flip onto a plate. Remove the parchment paper from the bottom of the cake then take your serving plate or platter and flip cake again so the top is now the top once more.

Serve slices with blackberry sauce drizzled on top and I mean it’s not like ice cream on the side would be out of place either.