Cauliflower Falafel

This truly needs no introduction.

No better way to end this Mediterranean week.

Cauliflower really wins the prize here. It does the job. I was super surprised at how well this actually turned out. And man, did it hit that falafel craving spot.

The end.


Cauliflower Falafel

guided by this recipe and this one

Ingredients:

2 cups cauliflower, riced to the size of couscous

1 small onion, finely chopped

3 cloves garlic, minced

¼ cup parsley, finely chopped

1 ½ tablespoons almond flour

2 teaspoons cumin

1 teaspoon ground coriander

salt, pepper, and cayenne to taste

2 eggs, beaten

oil, for frying

Directions:

In a large bowl, mix cauliflower, onion, garlic, parsley, almond flour, spices, and eggs together until well combined.

Cover and refrigerate for approximately 30 minutes. (Don’t skip this step, it helps to keep them together.)

Once the falafel mix has chilled long enough, heat up a small saucepan with approximately 2 inches of oil.

The cauliflower falafel mix will have let out a lot of liquid. Don’t worry.

When the oil is ready, scoop a couple tablespoons worth of falafel mix into your hand and shape it to about the size of a golf ball. While you are shaping it, squeeze as much liquid as you can out of the ball you are forming.

A few at a time, place the falafels in the hot oil.

Gently turn them over once they have begun to turn a deep brown color on one side. Remove them once both sides are a deep golden brown. Lay them to drain on a paper towel covered plate.

Yield: about 10 golf ball sized falafels

Serve with Spicy Delicata Hummus (if you’d like!)


Spicy Delicata Hummus

I promised you hummus yesterday.

I give you hummus.

Late. But better late than never.

How convenient that during my mediterranean craving craze I stumble across a recipe for squash hummus on my ever-favorite website: Food52.

I had stumbled across other chickpea-less recipes a long time ago, but I remember them calling for zucchini and that just always seemed to me a possibly very watery alternative.

Using hard squash though, I could see how that would work!

It did not disappoint. I switched up a few things here and there to my tastes, but it’s a pretty PERFECT alternative to traditional hummus. Depending on the flavoring, people won’t even know the difference. (Tested on real live co-workers!)
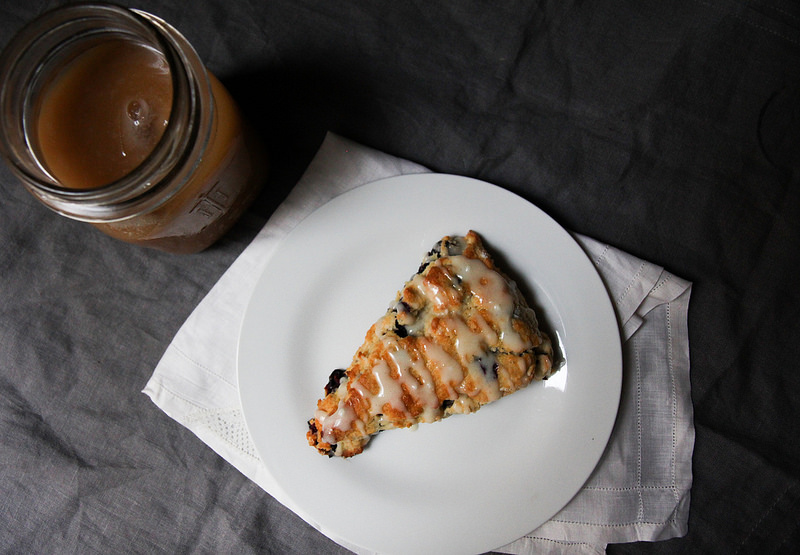
a revelation

a revelation

Can we just talk for a moment about roasted garlic. I mean, how have I not been doing this...forever. I've heard about it, and I may have actually encountered it that one time when I lived with a chef...but I've decided that it now needs to be something I do on a weekly basis.

Goodness, would you look at that?

Tomorrow, I’ll give you something to schmear it on.


Spicy Delicata Hummus

adapted slightly from this recipe at Food52

Ingredients:

2 pounds delicata squash (2 to 4 squash depending on the size)
1 head garlic (intact)

¼ olive oil plus more for roasting squash and garlic

overflowing ¼ cup tahini

1 chipotle pepper (and a dash of the sauce in the can if so desired)

squeeze of half a lemon

salt and pepper to taste

Directions:

Heat oven to 350 degrees

Slice your squash in half and scrape out the seeds. Drizzle the insides of the squash with olive oil and sprinkle with salt. Place the squash cut side down on a sheet pan and place oven. Roast for approximately one hour or until squash is soft when pierced with a fork.

At the same time you are roasting the squash, slice off about the top ¼ inch of a head of garlic. Grab a piece of aluminum foil and place your head of garlic in the middle. Drizzle the exposed garlic cloves with a bit of olive oil and then wrap up the head in the foil and place in the oven to roast until soft when pierced with a fork. The cloves should look caramelized. This will also take approximately one hour.

Once you’ve removed the squash and garlic from the oven, allow them to sit until they’re cool enough to handle.

Using a blender or food processor, scoop the roasted squash out of it’s skin directly into the blender cup or processor vessel (I used my nutribullet to great success.) Next, squeeze the garlic cloves out of their skins as well and into the vessel. You should be able to just pinch the bottom and they’ll sort of ooze out.

Add the remaining ingredients, and then blitz until everything is fully combined. Scrape out into a bowl. Taste for seasoning and adjust as necessary. Cover with plastic wrap and refrigerate for at least three hours before serving.

Serve with whatever you please! I snuck some warmed pita, and also schmeared it all over cauliflower falafels.

Makes about 2 cups

Fried Squash Blossoms

Now I’ve been playing with these cute little yellow flowers all summer and I finally found something I felt worth posting (though simple and unassuming it might be.)

But then I put it in my back pocket since I had assumed that going into September that it was probably too late for such summery things.

But then in a brief foray to a farmer’s market on my lunch break Wednesday, I spied with my little eye squash blossoms still sitting on a table. And so I feel it it is still appropriate as chilly as these mornings and nights might be to share this with you. If anything it may now seem comforting to stand over a hot pan of oil frying these off.

It took me a bit to figure out the proper breading technique for this delicate lacy little things. My first breading, my go-to, was too heavy for them. I tried just egg wash, just parm, just almond flour. But the key here is the tapioca starch, you could even leave out the parm if you wanted, it's for flavor more than anything. The tapioca starch here gets them nice and crispy but still keeps them light as air.

Traditional recipes also stuffed them full of other things. I will experiment with that next summer, I think. But for now I leave you with the most down to earth version, a fresh tasting bud with the nicest crunch and a sprinkling salt. Practically addicting. Especially dipped in a bit of fresh sauce.

Mangia, mangia!


Fried Squash Blossoms

Ingredients:

14-16 squash blossoms

¼ cup tapioca starch

palmful of grated parmesan ( if desired)

2 eggs

¼ cup of olive oil for frying

salt

Directions:

Mix the tapioca starch and the parmesan together on a medium sized plate.

Beat your eggs in a small to medium sized bowl. Put all your squash blossoms in that same bowl and gently toss them to cover them all in egg.

Heat the oil in a medium saute pan over medium heat.

While the oil is heating up, take a few of the egg coated blossoms and one by one dip them in the tapioca-parm mix to cover completely. Gently shake off the excess and set aside for frying.

Once the oil is hot enough (you can place the end of a wooden spoon in the oil to see if it sizzles) place a few blossoms in the pan. Don’t over crowd. Fry on each side until golden brown.

Lay to drain on a paper towel covered plate. While still hot from the pan sprinkle with a touch of salt.

Continue with the rest of blossoms.

I served these with Fresh Sauce for dipping, but they’re great just plain as well.

Pickled Carrots

Remember how I said everything should be pickled? Well, everything should be pickled.

And thanks to Food52 ---- who teach me the right way to do lots of things, I pickled some carrots. Some very purdy purple carrots from my CSA.

I have this strong urge a lot of the time to resist in consuming certain things because of how beautiful or shortlasting they are. Which I realize, is downright crazy and counterproductive. But sometimes, I still figure out ways to prolong their demise. Like pickling them or baking them into something.

Now pickling carrots isn’t so much of a novel idea, although it’s relatively new to me. Before this summer, I didn’t really realize you could pickle more than...pickles. (What a wretched life I led before coming into the good graces of vinegar.)

Obvs, I discovered things like Pickled Red Onions. But then on an outing to a fancy restaurant in SoHo, in lieu of the usual bread basket, the waiter passed around complimentary red grapes and pickled carrots. Everyone was thoroughly pleased with the combination and it was interesting and different to boot, even among the foodiest of foodies.

((To briefly veer off course a bit, can I tell you about the complimentary bacon grease popcorn I ate this weekend? Um, what? Yes. Exactly. It’s everything you’re thinking right now. This was at the same restaurant of Pickled Peach fame. Pickled peaches, yet another revelation.))

Okay so getting back to business. These carrots were so gorgeous, at first I wasn’t sure what to do with them. Eating them raw seemed just too boring but roasting or cooking them seemed too harsh an out.

However, preserving them in a fabulous magenta pickling liquid to last at least another couple weeks seemed perfectly appropriate.


Pickled Carrots

as guided by this Food52 article

1 pound carrots, trimmed of their tops, scrubbed, and halved

2 cups white wine vinegar

⅔ cup water

⅓ cup honey

2 ½ tablespoons salt

1 tablespoon peppercorns

Place the halved carrots in a large glass mixing bowl.

In a small saucepan bring the vinegar, water, honey, salt and peppercorns to a boil. Once boiling remove from heat and pour the hot pickling liquid over the carrots. To keep carrots submerged in the brine, place a plate on top of them.

Let carrots and brine sit and cool completely.

Once cool, place carrots and brine in a sealed container. 

Will last 3 weeks to a month in the refrigerator.

Makes about 1 quart

Fresh Pea Deviled Eggs and a few excuses...

Oops. Hello, hi, I know…it’s been too long.

Yes? What was that? Sorry I can barely hear you over my own self doubting and guilty thoughts about not keeping up with this the way I wanted to.

Okay. Off to make a real go at it, starting……...now!

So, after many, many a weekend of not being in the comforts of my own kitchen, I’m hoping to get back on track here. Two of these past weekends were spent at my mother’s in CT. So while I couldn’t do my usual farmer’s market runs, I did spend the days weeding the garden, making flower bouquets, and picking wild raspberries from around the yard.

Can’t get more local than that, really. I know, woe is me.

Then, I spent this past weekend eating my way through Austin, Texas. See what did I tell you, full of excuses. I was visiting friends but mainly I stuffed my face with naughty, naughty (utterly delicious) food.

Of course, me, being who I am, I managed to come upon a farmer’s market, and somehow restrained myself from buying all the peaches and fresh tomatoes I saw. It was hard. Austin was full of friends, puppies, tacos, and hot Texas sun and I’m already missing it - but I’m also looking forward to my first free weekend in my city of New York in a while. Back to the market and back in the kitchen I go! I can’t wait, I have truly missed it.

In other more relevant news --- at one point I did get around to using some of my shelling peas from my CSA and have the pictures to prove it!

14537427701_5146d3a2a1_z.jpg

I was inspired by smitten kitchen’s spring asparagus version of these deviled eggs and when she suggested using peas instead, I made a mental note to do so. They were the first thing I thought of when I got them in my farmshare last week.

14560931023_f515b7a7db_z.jpg

The eggs in the pictures look super green because I used mashed avocado instead of mayo, but mine went brown pretty darn fast. I would use mayo next time instead which is what the recipe below reflects.

These eggs had a lovely pop of freshness in an otherwise usually rich bite. Can’t wait to make them again with mayonnaise instead. Although, let me say, the avocado didn’t taste bad whatsoever, so if you’re anti-mayo it’s still a tasty choice. They just go from beautifully green to disgustingly brown in about 5 seconds, so eat them up fast!

14539851682_8083366cf6_z.jpg

Fresh Pea Deviled Eggs

inspired by these eggs over at smitten kitchen

Ingredients

4 hard boiled eggs

3 tablespoons fresh peas - shelled, blanched, and smashed or pureed

2 tablespoons mayonnaise (I use Sir Kensington’s)*

Squeeze of half a lemon ( approx 1 tablespoon juice)

½ tsp dijon mustard

salt and pepper to taste

*(If going the avocado route - use 2 tablespoons of avocado that has been mashed with a bit of fresh lemon juice)

Slice your hard boiled eggs in half and place the yolks in a bowl and set the whites aside.

(P.s. this is how I’ve been hard boiling my eggs with terrific results.)

Take your smashed peas, mayo, lemon juice, mustard and put them in the same bowl as the yolks and mash together to incorporate. Stir in your salt and pepper to taste.

Once fully mixed together, scoop yolk mixture and spread out equally among the egg whites. Serve immediately (recommended if you use avocado) or refrigerate covered in plastic wrap until ready to eat.

Last note, I fully recommend reading through the entirety of the smitten kitchen asparagus recipe from above. She has so many tricks and tips up her sleeve that are super helpful for making just the prettiest deviled eggs there could be.

Pickled Red Onions

Is it too late for an easy, quick Fourth of July condiment recipe? I know it’s practically over, but due to the East Coast’s complete wash out of a Fourth, perhaps some of y’all will be celebrating tomorrow? That’s what we’re doing and I will be sharing this love then. On all the burgers and all the hotdogs. Bunless, they might be. Tasteless, not so. 

As previously mentioned yesterday. I had time to do no things this week. I am le worst. So all those lovely veggies I lugged home from the market last Saturday have yet to meet their true destiny as the picnic salads I had planned to get done pre-July 4th. Gah! Even if you did celebrate today, this quick topping will hopefully elevate that cold burger you sneak out of the fridge at midnight.

I’ve only suddenly, recently, begun to adore red onions. With foods and me, it’s like a switch. One day I will hate something particular, the next day -- oh hey! You like this now! It happened with pickles, hot dogs, olives, AVOCADOS! For the life of me I can’t believe I went so long not eating avocados. I’ve thoroughly made up for lost time with those, let me tell you. It’s interesting how our palates change. So now, all of a sudden, like two weeks ago, I’ve been like -- I want all the red onions! Put them in all the salads, burrito bowls, on top the burgs!!! Charred or raw, doesn’t matter. I don’t know what hit me. So after inhaling a burger at a local restaurant that had a pickled red onion relish on it, the next logical thing to do was figure out how to pickle them at home.  

They're terribly easy to make, and definitely worth it. This is an all summer recipe really (maybe even all year), and I plan to have a jar of them on hand indefinitely.

Pickled Red Onions

1/4 cup white wine vinegar

1 tablespoon honey

1 teaspoon salt

1 tsp whole peppercorns

1 1/2 cup water

1/2 red onion, sliced

In a small saucepan, bring vinegar, honey, salt, peppercorns, and water to a boil. Add in the sliced red onion and reduce heat to a simmer. Simmer for 3-5 mins, then remove from heat and let cool.

Place in a sealed container. They will last for about two weeks in the fridge.

Put on everything.